
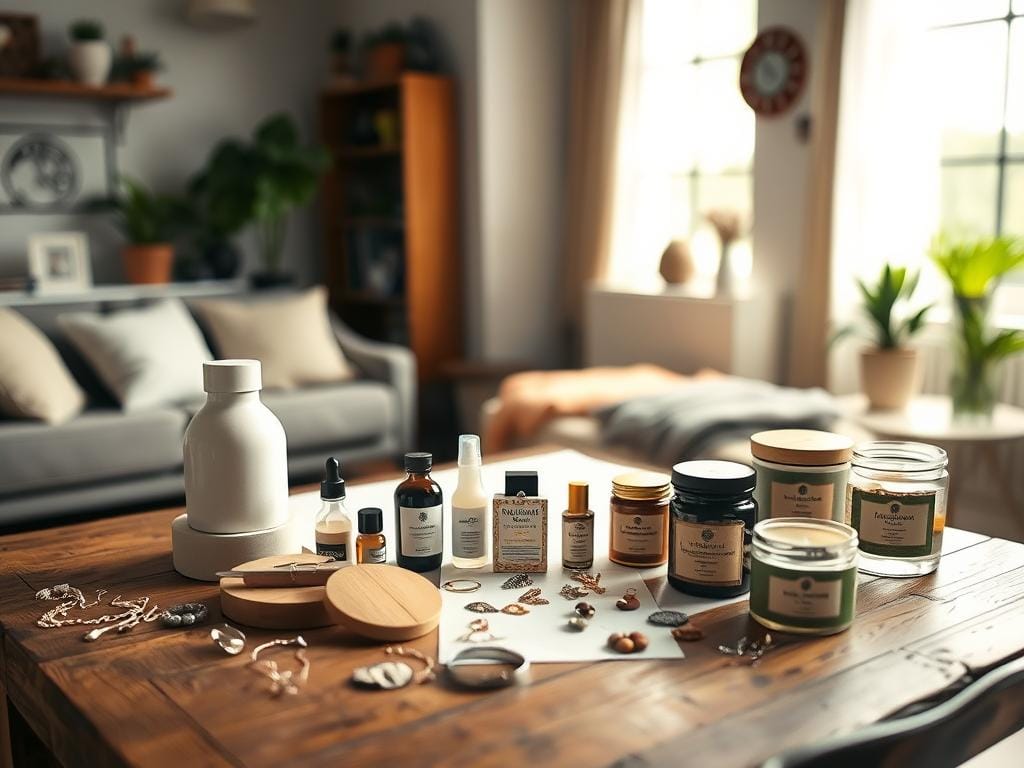
Are you tired of listing items that look like they were taken with a phone? Stop losing sales to bad lighting and messy backgrounds. This guide will show you how to turn your kitchen into a mini studio.
In this section, you’ll learn a quick guide. First, control the light. Then, set your camera settings the same every time. And, get your photos ready for Instagram and online stores. Follow these steps and you’ll make images that sell well, without spending a lot on a studio.
Key Takeaways
- Control light before anything else-use window light or an affordable LED + diffuser for consistent results.
- Start with a tripod and repeatable camera settings: ISO 100, f/8-f/11, manual white balance, shoot RAW.
- Plan each shoot: define deliverables, create a short shot list, and prep the product to avoid last-minute retakes.
- Include social-ready crops for Instagram while exporting marketplace sizes for Etsy, Shopify, or Amazon.
- Keep styling simple and consistent to build a cohesive catalog that boosts buyer trust.
Why product photography at home matters for small-item sellers
Instagram loves clear, nice-looking pictures. For sellers on Etsy, Shopify, and Amazon, good photos help people find and buy things. They look great in different sizes and shapes.
Good photos from home can look as good as studio ones. You can use natural light or add special lights for better pictures. This makes your products look great online.
Plan your photo shoots well to avoid wasting time. A simple list and getting your products ready fast helps. This makes your photos look clean and honest, building trust with customers.
Doing product photos at home helps with marketing and keeping things in order. It makes your products look better and your brand stronger. It’s cheaper than renting a studio or hiring someone else.
For great photos, use the right light, simple backgrounds, and focus well. Take pictures from different angles and sizes for social media. These tips help more people click on your listings.
Planning your shoot: what to prepare for each small item
Good planning saves time on set and in post. Start with a clear purpose for each image. This way, you know which angle sells the product best online and on social media.
Keep deliverables simple. Have one hero image for the marketplace, a square crop for Instagram, and a close-up for product detail pages.
Define the purpose and deliverables
Decide if an image must meet GS1 or marketplace rules before you shoot. Pick aspect ratios that fit Amazon, Etsy, Shopify, and Instagram. This avoids wasted crops later.
Label deliverables with size and crop notes. This helps editors and listing managers get what they need.
Shot list and timeline
Create a short shot list for each item. Include a hero shot, a 45° angle, a tight detail, and a scale shot with a coin or ruler. This shows size.
A clear shot list for product photography keeps sessions focused. Block short, repeatable sessions instead of one long day.
Set deadlines for capture, review, and editing. Use dated folders named with the product and subfolders for RAW and edited files. This makes files easy to find.
Product prep and handling
Set up a dedicated zone with marked camera and light positions. This reproduces shots consistently. Clean items with a lint-free cloth and wear cotton gloves for shiny surfaces.
Use compressed air or a fine brush for textiles. Test a single setup, note adjustments, and add those steps to your workflow. Good product prep avoids retakes and keeps the catalog consistent across large volumes.
Window light vs artificial lights: choosing the best lighting setup
Choosing between natural window light and studio fixtures shapes the mood, speed, and consistency of product shoots. This short guide compares the strengths of each approach. It shows how to blend them with simple tools like reflectors and flags for reliable results.
Pros and cons of natural window light
Natural window light gives soft, flattering tones with almost no cost. North-facing windows work well in the United States for steady, even illumination during the day.
Direct sun can create harsh shadows and specular highlights on shiny surfaces. Use a translucent diffuser panel or a white shower curtain to tame hotspots and keep contrast low for small items.
Window light product photography shines on social feeds because images feel organic. Plan shoots for early morning or late afternoon to capture warm hues and gentle gradients.
Simple artificial lighting for control
Artificial lighting for products gives repeatable output and quick setup. Continuous LED panels and daylight-balanced bulbs let you see results instantly and avoid surprise color casts.
Keep lights 2-3 feet from the subject to reduce hotspots on metal or glass. Use softboxes or umbrellas when you need broad, soft illumination for small items.
A common error is mixing daylight (about 5,500-6,500K) with tungsten (2,700-3,200K). Match the color temperature and set white balance in-camera or in RAW to avoid mismatched tones.
Hybrid approach and flags/reflectors
Blending window light with artificial sources can produce dynamic images while retaining a natural look. Aim to set artificial light at roughly half the power of the window to maintain daylight dominance.
Use reflectors and flags to shape the mix. White foam board or silver reflectors bounce fill back onto shadowed areas. Black flags cut spill and deepen shadows for contrast on clean backgrounds.
For changing light, measure the window intensity and dial continuous LEDs to match. Cross-lighting techniques place an LED opposite the window; tweak power until subject brightness balances with the background.
| Scenario | Best fit | Key tools | Notes |
|---|---|---|---|
| Fast social shots | Window light product photography | Diffuser, reflector | Soft look, plan by time of day, watch aspect ratios |
| Consistent catalogue images | Artificial lighting for products | LED panel, softbox, light stand | Repeatable output, set manual power and white balance |
| Reflective or glass items | Hybrid approach | Flags, reflectors and flags, backlight | Use flags to block unwanted reflections and soft backlight for edges |
| Small items on white | Artificial lighting for products | Light tent, continuous LEDs, foam board | Even diffusion prevents hot spots and eases post-processing |
| Learning and testing | LED continuous lights | Portable LED, diffuser, reflector | See changes in real time, beginner-friendly setup |
For a deeper comparison of natural and artificial choices, consult this guide from FDPhotoStudio to match techniques to your workflow: natural vs artificial light guide.
DIY lighting setups that produce studio-like results
Good lighting makes a simple product look great. Use easy setups to save time and keep your photos looking the same. Here are three DIY rigs for clean, sale-ready shots and lifestyle photos.
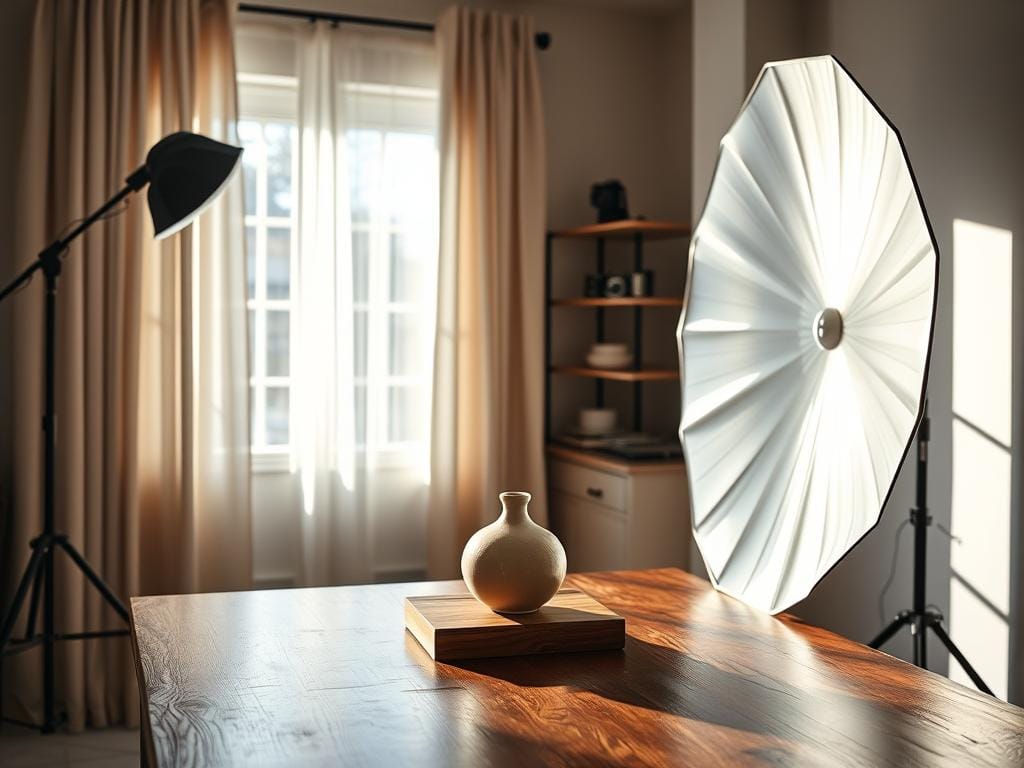
Window + reflector sweep setup
Put the product at a 45° angle to a big north-facing window. This gives soft, even light. Place a foam board or polystyrene sheet on the other side to lift shadows.
Use a curved white sweep behind the product for a seamless backdrop. If the sun is too strong, hang a diffuser like a sheer curtain to soften the light.
Mark the floor with tape to remember the setup. This setup is great for jewelry, small electronics, and crafts for web and Instagram.
Single LED panel with diffuser
Mount one continuous LED at about 45° to the product as the key light. Use a soft diffuser panel or frosted acrylic to soften shadows.
Place a white card on the opposite side as a fill reflector. An LED + diffuser kit is affordable and works well for many items.
Remember the light height, tilt, and panel brightness for consistent shots. This setup is quick and easy for small items.
Basic multi-light tabletop rig
Use two side lights as key and fill to shape the product. Add a back or hair light to separate the subject from the background.
Use small softboxes or umbrellas for broad, soft light. Add flags to block unwanted light and keep the backdrop pure.
Mark stand positions and camera location on the floor. For lots of work, use a preset turntable and consistent camera settings to speed up editing.
| Setup | Best for | Key gear | Repeatability tip |
|---|---|---|---|
| Window + reflector setup | Jewelry, ceramics, lifestyle web shots | Large window, foam board, white sweep, diffuser | Mark tape positions for window, reflector, and camera |
| Single LED panel with diffuser | Small electronics, single-product flat-lays | LED panel, diffuser, white fill card, light stand | Record panel angle, height, and brightness level |
| Basic multi-light tabletop rig | Glass, glossy items, product packs | Two small softboxes, backlight, flags, stands | Number stands and mark floor for quick setup |
Camera gear and settings for sharp small-item images
Getting good photos starts with the right gear and technique. Choose tools that fit your budget. Use Instagram for quick, sharp photos.
Recommended gear for home setups
For smartphones, get a recent model with Pro or RAW mode. Add a phone tripod mount and a small LED panel. For cameras, a crop or full-frame body works well.
Key accessories include a sturdy tripod, remote shutter, and macro lens. A 50mm prime lens is great for small items. Use light stands, clamps, and a weighted base for steady lights.
Optimal camera settings
Start in manual mode and set daylight white balance. Use ISO 100 to avoid noise and shoot RAW for editing. Choose aperture between f/8 and f/11 for sharp images.
Shutter speed depends on the light. Use slower speeds with continuous LEDs and a tripod. For hand-held lamps, aim for 1/125 sec. Adjust exposures with lights, not ISO.
Focusing and stability tips
Use single-point AF or manual focus. Zoom live view to check sharpness. Mark tripod position with tape or a rubber mat.
Pair a remote release or 2-second timer with a sturdy tripod. For small subjects, use a focusing rail or small slider.
- recommended gear for product photography: phone with Pro mode or mirrorless/DSLR, tripod, macro lens, remote shutter.
- camera settings product photography: ISO 100, aperture f/8-f/11, manual exposure, RAW files, locked white balance.
- tripod and focus tips: single-point AF, live view zoom, repeatable tripod marks, remote release or timer.
Styling small items: backdrops, props, and composition that sell
Good styling makes a product photo tell a story. Aim for images that feel natural and speak to buyers aged 25 and up. Keep the layout clean for easy viewing on mobile and desktop.

Choosing a backdrop is key. For e-commerce, a white sweep focuses on the item and meets specs. Muted greys or soft pastels make colorful pieces stand out. Matte textures cut glare.
Paper, canvas, and textured wood are great for lifestyle shots that match a brand.
Choosing a backdrop
Match the backdrop to the product’s mood. Use white or light neutral for catalog shots. For a lifestyle look, pick pastels or warm wood.
Prop selection and arrangement
Keep props simple. Use one hero item and one or two supporting elements. The rule of odds helps achieve balance.
Vary heights with blocks, books, or small risers for depth. Choose props that add context without taking attention from the product.
Handling reflective and transparent products
For reflective products, use polarizing filters and careful light placement. Use flags to shape highlights and prevent stray reflections.
Backlighting with black flags defines glass edges and separates the item from the backdrop. For jewelry, wear lint-free gloves and use small stands or wax to fix position and avoid fingerprints.
| Styling Goal | Backdrop Choice | Prop Type | Lighting/Handling Tip |
|---|---|---|---|
| Clean e-commerce look | White sweep or light grey paper | Minimal: one supporting prop | Soft, even light; avoid shine with matte surfaces |
| Natural lifestyle feel | Textured wood or canvas in muted tones | Context props: cups, linens, plants | Window light or warm LED; keep shots candid |
| Color emphasis | Pastel backdrops for contrast | Neutral props that pick up a color accent | Controlled highlights; use reflectors to fill |
| Reflective or glass items | Neutral matte sweep with black flags | Invisible supports, small stands, wax | Polarizer, precise flags, backlight to define edges |
Practical post-processing workflow for consistent results
Keeping product pages the same is key. Start with a clear import routine. Then, edit with care and export with the same settings every time. This makes listing updates faster and keeps your brand looking good.
First, import RAW files into Lightroom or Capture One. Keep your folders neat: date / product-name / raw / edited. Always back up your RAW files before editing.
Use a grey card to set the white balance. This keeps colors the same across all photos.
Importing and organizing files
Use the same folder structure and naming every time. Make collections or smart albums in Lightroom. This helps you sort by product, date, or variant.
Quickly sort images with flags and ratings. Pick your favorites and remove bad shots. Tag photos for Instagram to get them ready for social media.
Essential adjustments
Start with a preset that covers the basics. Adjust exposure, shadows, and highlights first. Then, fine-tune the white balance from the grey card.
Sharpen images carefully, around detail 25-30 in Lightroom. Be careful of halos. Use masking to protect edges. Check AI edits for mistakes.
Export settings and presets
Save export settings for different places. For e-commerce, export as JPEG in sRGB. Make sure the long edge is 2000 to 3000 pixels and quality is 80-90.
Keep a master editing preset. Update it when your lighting or camera changes. Use automation for bulk work, but check each batch for color and detail.
- Lightroom workflow: import, sync white balance, apply master preset, local fixes, export preset.
- Export settings for e-commerce: JPEG, sRGB, long edge 2000-3000 px, quality 80-90, sharpen on export as needed.
- Editing presets: create versions for product, lifestyle, and social crops to speed delivery.
Common mistakes and how to avoid them
Small-item shoots often fail because of a few repeatable errors. Fixing these early keeps product pages and Instagram feeds clean, professional, and sale-ready. Below are practical fixes you can apply today.
Mixing light temperatures
Mixing daylight with tungsten creates odd color casts. This forces heavy white-balance correction. Lighting errors product photos most often come from uncontrolled mixed sources.
Use daylight-balanced LEDs or set a custom Kelvin value on your camera. Block stray warm bulbs with flags or simple blackout cloths. Test shots with a gray card make color checks fast and repeatable.
Ignoring dust, fingerprints, and small details
Minute blemishes show up at 100% crop. Ignoring them creates extra retouch time or, worse, lost sales from poor impressions. Cleaning products for photography such as microfiber cloths, canned air, and lens cleaning fluid are essential.
Wear nitrile gloves when handling shiny items. Wipe and inspect under bright light, then photograph and zoom to confirm. If a flaw appears, retake the shot.
Inconsistent framing and catalogue drift
Inconsistent product framing undermines brand trust. It makes listings look amateur. Catalogue drift often starts when tripods, lenses, or presets change during a shoot.
Mark tripod foot positions and record camera height, focal length, and aperture. Use a short shot list and camera presets to keep images aligned. Consistent product framing helps shoppers compare items quickly and click buy.
Keep backgrounds simple and avoid over-styling for e-commerce. For volume work, document repeatable setups and validate automated edits to maintain quality across a catalogue.
Scaling up: when to automate or hire a pro
As your shop grows, photo needs change. You might need to automate or hire a pro. This guide helps you decide.
Signs you should consider automation
Big catalogs and new items often mean it’s time to automate. Use turntables and light tents for quick, uniform shots.
Automation is key for fast work and social media posts. It saves time and keeps photos looking the same.
When to hire a professional
For high-quality images, hire a pro. They’re great for detailed shots and custom lighting. They work fast for big projects.
It’s smart to outsource for big projects. This saves money and ensures quality. Professionals can also help with branding.
Hybrid workflows
Use both automation and pro shoots for the best results. Automated rigs are good for everyday shots. Save studio time for special images.
Hybrid workflows mix automation with pro skills. Test systems like Alphashot PRO G2 before big purchases. This ensures quality and speed.
Think about costs over time. Compare equipment costs to hiring pros. A good mix often saves money and keeps quality high.
Resources, quick-shareables, and next steps
Start by using Instagram’s product photography resources for ideas. Make your photos ready for posts, stories, and thumbnails. Keep a list of quick tips: control light, use a tripod, and more.
Get guides for planning shoots, lighting, and camera settings. Use simple lighting setups at home. Send a message to collaborators with your plan and gear list.
For DIY photography, pick a product and set up your light. Shoot test frames and apply a preset. Back up your RAW files right away. Check GS1 image standards and use tools like Orbitvu or Alphashot PRO G2 for more work.
Explore Pixc and The School of Photography for more tutorials and presets. These resources and tips are always useful. Automation and AI help, but always check your work.