
We’ve all been there. You pull your phone from your pocket, ready to capture a moment, only to find fingerprints smudged across the lens. The shot turns out blurry, and the composition is crooked. Frustrating, right? But fear not! There’s a practical fix that doesn’t involve buying a new camera.
Modern devices are powerful tools that can capture, process, and share images all in one go. No more transferring files from a DSLR to your computer. With just a few adjustments, you can elevate your images without spending a dime. The secret often lies in the basics: composition, light, focus, and timing. These elements can significantly enhance your photos, sometimes even more than fancy specifications.
Remember, a 48 MP camera doesn’t guarantee stunning results if the fundamentals are ignored. So, let’s dive into how to make the most of your existing gear.
Quick Answer: To improve your shots, clean the lens, utilize natural light, tap to focus, stabilize your device, avoid digital zoom, and edit your photos selectively. With these simple steps, you can transform your everyday captures into something truly special.
Key Takeaways
- Composition, light, and focus are key to great photos.
- Cleaning your lens can drastically improve image quality.
- Using natural light enhances your shots significantly.
- Avoid digital zoom for better clarity in images.
- Editing can elevate your photos without needing new equipment.
Discovering the Benefits of Smartphone Photography
Imagine capturing the perfect moment while commuting or enjoying a lunch break. With a device in your pocket, you can seize unexpected opportunities that a bulky camera might miss. The convenience of having a camera always at hand opens up a world of creativity.
Smartphones offer an integrated workflow for capturing, editing, and sharing images seamlessly. Unlike traditional cameras, which often require tedious file transfers, your phone allows you to create and share instantly. This streamlined process is a game-changer for those of us who want to document life on the go.
Moreover, built-in features like Portrait, HDR, Night, and Panorama modes provide beginners with the tools to enhance their images without the complexity of professional setups. While portability is a huge advantage, it’s essential to be intentional about your choices—considering the subject, light, and framing.
For the best results, I recommend shooting during the golden hour, when the light is soft and warm. Open shade can also work wonders for portraits and street scenes. Remember, the best camera is often the one already in your hand when the moment arises.
Overcoming Everyday Photography Pain Points
It’s disheartening when a moment is lost to a fuzzy image. A dirty lens can lead to blurry photos, and this is a common issue. Start by developing a habit of cleaning your lens regularly. Dust, fingerprints, and even raindrops can create hazy images.
When taking a shot, make sure to tap the screen to focus on your subject. This prevents the camera from mistakenly focusing on distracting elements like a tree or window edge. For better stability, use two hands and tuck your elbows in, especially in low-light situations where longer exposures are needed.
Remember, small sensors in smartphones can struggle in darkness, often resulting in grainy images. Instead of relying on digital zoom, which can pixelate your photos, opt for optical zoom options like 0.5x, 1x, 3x, or 5x if available. If you need to get closer, move with your feet and correct the horizon in an editing app.
smartphone photography tips
Every moment is an opportunity for a stunning capture. To help you take better photos, here’s a practical checklist:
- Clean the lens: A dirty lens can ruin your shots.
- Tap the subject: Ensure your focus is sharp by tapping on the subject on your screen.
- Stabilize your phone: Use both hands or a tripod to avoid shaky images.
- Use natural light: Whenever possible, opt for natural light instead of flash.
- Check the edges: Before you snap the photo, ensure nothing distracting is in the frame.
Additionally, the volume buttons on your device can serve as a discreet shutter control. This is especially useful for candid moments when touching the screen might disrupt the scene.
Remember to avoid the built-in flash for most portraits. Instead, rely on natural light or a small LED source for better results. Try varying your angles and distances instead of taking the same shot repeatedly. As a fun challenge, take five different frames of one subject and see which one tells the strongest story.
Unlocking Advanced Camera Settings on Your Smartphone
Capturing stunning images is about understanding the settings available on your device. Mastering these features can elevate your photos from ordinary to extraordinary.
Exposure is a critical factor. It balances brightness, motion, and noise. Adjusting exposure compensation can protect highlights when a bright sky overwhelms your subject. For instance, using a fast shutter speed of 1/1000 second can freeze the action of a moving cyclist, while a slower speed of 1/10 second captures motion blur, perfect for low-light scenes.
When it comes to ISO, I recommend using ISO 100 when conditions allow. This setting helps limit grain in your images. Additionally, manual focus can be beneficial when photographing through glass or framing a still subject.
Another powerful feature is HDR, which combines multiple exposures to preserve detail in both shadows and highlights. This is particularly useful for high-contrast landscapes. However, consider disabling it if you want a more dramatic effect.
Device-specific features can also enhance your experience. For example, iPhone users can explore Photographic Styles, while Samsung users benefit from Expert RAW. Google Pixel enthusiasts can utilize computational photography and the Magic Eraser for seamless edits.

Nailing Creative Composition Techniques
Mastering composition can transform an ordinary shot into a visual masterpiece. Understanding how to arrange elements within your frame is crucial for impactful images. By applying certain techniques, you can create stunning photos that capture attention.
One effective method is the rule of thirds. Most camera apps display a 3×3 grid, helping you position key elements near the intersections. This approach encourages dynamic compositions rather than centering every subject. Remember, this rule is flexible; centered symmetry can work when the scene calls for it.
Another technique is the rule of odds, which suggests using groups of three, five, or seven subjects. This creates visual interest and balance. Also, leading lines—like roads or branches—can guide the viewer’s eye toward the main subject, enhancing focus.
Before shooting, clean the edges of your frame to eliminate distractions. Additionally, experimenting with different perspectives can yield unique results. Try crouching low or shooting from above, especially for landscapes.
| Technique | Description | Example |
|---|---|---|
| Rule of Thirds | Positions elements near grid intersections | Placing a person off-center |
| Rule of Odds | Uses groups of odd numbers for visual balance | Three flowers in a shot |
| Leading Lines | Guides the viewer’s eye to the subject | A road leading to a mountain |
Enhancing Your Shots with Essential Accessories
When it comes to elevating your photos, the right accessories can make a world of difference. These tools can help you capture stunning images, whether you’re shooting portraits, landscapes, or products. By integrating essential accessories into your setup, you can tackle common challenges and improve your overall results.
One must-have is a compact adjustable tripod. This accessory is perfect for multi-second exposures, time-lapses, and product photography. It ensures stability, preventing any hand movement that could soften your images.
A Bluetooth remote is another valuable addition. It allows you to trigger your mounted device from a distance, reducing camera shake. This feature is especially useful for self-portraits or group shots.
Consider using clip-on lenses tailored to your subjects. A wide-angle lens works well for expansive landscapes, while a macro lens is ideal for capturing intricate details of flowers or small products. Just remember to check compatibility and read reviews, as quality can vary significantly.
For indoor shots, lighting is crucial. Set up near a large window with sheer curtains to diffuse harsh daylight. If natural light isn’t available, portable LED panels or ring lights can provide the necessary illumination. They should shape shadows instead of simply brightening every surface.
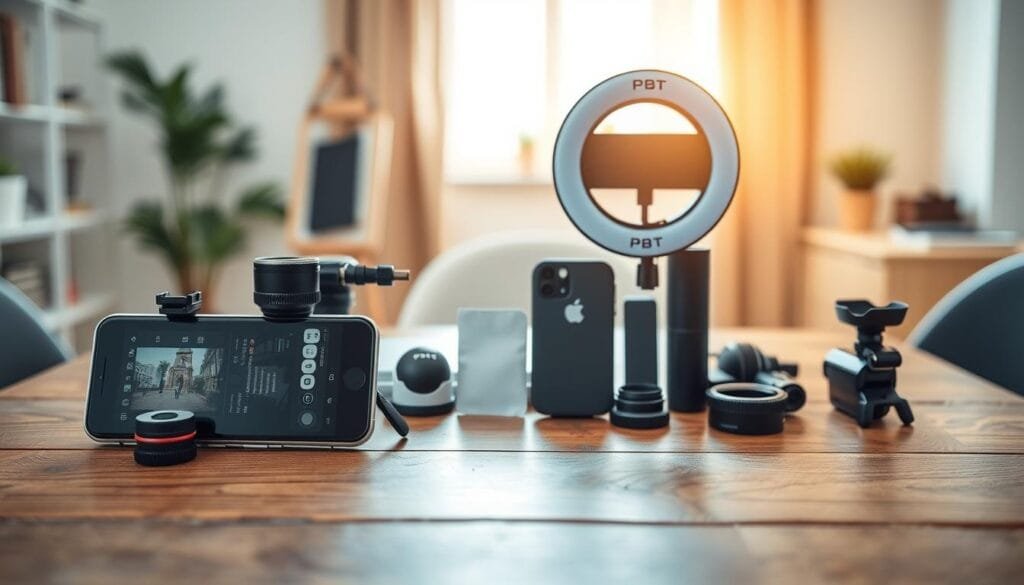
Editing Apps and Studio Setup Ideas
In today’s digital age, the right editing tools can turn good images into great ones. Popular apps like VSCO and Snapseed offer unique features for enhancing your photos. VSCO is known for its minimalist controls and film-simulation presets, while Snapseed provides broader adjustment tools for more detailed edits. Another option to consider is Lightroom Mobile, which combines both simplicity and depth.
Eric Kim, a renowned photographer, highlights an important distinction: “Editing” involves selecting the strongest photographs, while “post-processing” refers to modifying aspects like exposure and contrast. To create a consistent aesthetic, I recommend using one preset or color approach for a set period. This helps your portfolio feel intentional rather than a random collection of filters.
For a simple studio setup, use a tripod to stabilize your shots, and position your subject near an indirect window light. Ensure you have a clean background and lock focus on your subject. Lowering the exposure slightly can enhance details, especially in product photography.
Lastly, to protect your work, develop a habit of backing up your images to the cloud every Friday. This way, you won’t lose precious memories if your phone gets damaged.
Mastering Portrait and Landscape Modes
Understanding how to use your device’s modes can significantly enhance your images. Two of the most valuable features are Portrait and Landscape modes. Each serves a unique purpose, helping you capture the essence of your subjects and surroundings.
In Portrait Mode, the background blurs to emphasize the subject. For the best results, position the person well away from walls or furniture. This distance allows the simulated blur to look more natural. Use soft, indirect light from a window to create flattering skin tones. If direct sunlight is too harsh, sheer curtains can help diffuse the light.
Don’t forget to tap the subject’s face on the screen to set focus. Check for any stray hairs or fingers that might disrupt the image before you take the shot.
When capturing landscapes, consider the different modes available. Use standard, ultrawide, or telephoto settings based on the scene’s scale. For wider scenes, horizontal framing works best, while vertical framing is ideal for tall structures or trees. Golden-hour light around sunrise or sunset adds a warm glow, enhancing your images.
Budget-Friendly Substitution Ideas and DIY Tips
Capturing amazing moments doesn’t always require the latest gear. You can enhance your photography without spending a fortune. Here are some cost-effective alternatives and DIY ideas that can elevate your images.
First, consider using the device you already own. Older smartphones can be great creative tools, pushing you to focus on light and composition. Instead of upgrading, make the most of what you have.
A simple substitution tip is to use a friend’s smartphone flashlight covered with a small tissue. This creates a softer side light for your shots, giving a more flattering effect while keeping the tissue away from heat.
If a tripod is unavailable, stabilize your phone against a stack of books or a solid shelf. Just be cautious to avoid unstable positions near people or pets.
For product and portrait setups, a white wall, pale card, or clean sheet can serve as a low-cost reflector or background. This will help enhance the light and overall image quality.
Remember, the 2016 iPhone SE was priced at $399, but treat that as context rather than a current price claim. Instead of investing in expensive cameras, consider using the money saved for photo books, workshops, or travel experiences that can enrich your photography journey.
Final Reflections and Next Steps
Every shot is a chance to tell a story. To improve your results, remember these five key takeaways: clean the lens, prioritize good light, tap to focus, compose deliberately, and practice with your device before considering another camera.
As Eric Kim emphasizes, the cycle of taking many photos, receiving feedback, and refining your skills is the simplest way to grow. Don’t rush to share your best work; take time to reflect and back up your images weekly. Printing strong pieces can also bring joy in a physical form.
For more insights, find out more about the Creative Circle photography and explore broader learning opportunities within a photography-focused community.
Send this to a friend who keeps blaming their phone for blurry photos; the fix may be a clean lens, better light, or steadier hands.
References: Smartphone Photography Top Tips; Creative Circle photography membership; Eric Kim.
FAQ
What is the best way to improve my photo composition?
How can I reduce blurriness in my photos?
What camera settings should I adjust for better image quality?
How can I enhance my photos after taking them?
What should I consider when using portrait mode?
Are there budget-friendly alternatives to expensive photography gear?
Struggling to get consistent photography clients?
Get More Photography Clients