
Photos that make skin look jaundiced or like a cyan mannequin are frustrating. They kill engagement on Instagram. The fix isn’t in Photoshop; it’s in-camera.
Use the right camera white balance and quick reference frames. This way, skin tones look real straight off the card.
I promise you’ll learn practical, testable steps. You’ll stop orange indoor casts and blue outdoor casts. You’ll speed up your RAW workflow and avoid endless back-and-forth in post.
You’ll get simple in-camera tactics and a quick grey-card trick. Plus, two ready-to-share tips for social posts and client messages.
Key Takeaways
- White balance for natural colors starts on set—correct camera white balance reduces post work.
- Natural skin tones photography needs attention to photography color temperature: tungsten makes skin warm, shade makes it cool.
- Shooting RAW preserves white balance changes so you can safely tweak later.
- Carry a grey card and take one reference frame to copy white balance across the batch.
- Use Instagram before/after posts to show clients the value of accurate color and build trust.
Why white balance matters for natural skin tones photography
Getting colors right starts with white balance. On sites like Instagram, people decide fast if a photo looks real. Photos with natural skin tones make people want to look more.
How color temperature affects perceived skin tones
Color temperature is the light’s hue. Warm lights make skin look orange. Cool lights make it look pale.
The eye and brain adjust quickly. But cameras need white balance to capture the right light.
Why getting white balance right in-camera saves editing time
Start with the right white balance. Most editing is just small tweaks. Shooting RAW helps a lot.
Big white balance changes can mess up skin. This means more editing and less consistent results.
The psychological impact of accurate colors on viewer trust
Colors tell us about health and truth. Photos with natural colors build trust. Untrue colors can hurt credibility.
Quick tip: use a grey card or a preset that matches the light. Small changes in-camera save a lot of editing time.
Understanding photography color temperature: the Kelvin scale
Photography color temperature shows if a light is warm or cool. It’s measured on the Kelvin scale. Knowing this helps you get natural colors before editing.
Visual examples help show the differences. Try taking pictures at different Kelvin settings side by side.
Typical Kelvin values for common light sources
Candlelight is very low on the Kelvin scale, about 1000K. It gives a rich orange warmth. Tungsten or household bulbs are around 2700K to 3200K, feeling warm and amber.
Daylight at noon is near 5600K, a neutral baseline. This is what many cameras use.
Shade and overcast skies are above 7000K. They give a cooler, bluish cast. Knowing these ranges helps you adjust camera settings or use a grey card.
How changing color temperature shifts the entire image
Changing the Kelvin value affects every pixel. Not just skin tones. White walls, fabrics, highlights, and shadows all change.
Lowering the Kelvin makes scenes warmer and more orange. Raising it makes them cooler and bluer. Cameras add blue to counteract warm light, making scenes look natural.
When cooler or warmer tones are a creative choice vs. a problem
Warming a portrait with a Cloudy preset can be creative. It flatters skin and adds coziness. Many use slight warmth in interior and landscape shots to enhance mood and color.
But, a cast that misrepresents skin tones or product colors is a problem. For commercial work, aim for natural colors. For personal projects, use creative intent but document your Kelvin choices.
Practical tip: note the dominant light source and its Kelvin range. Use manual Kelvin entry or a grey card when accuracy matters. Then, shoot RAW to keep flexibility in post.
Camera white balance settings explained
Getting camera white balance right starts with knowing your camera’s tools. Most cameras offer quick options for neutral tones. Use Auto White Balance to ease your mind while you set up.
Switch to presets when the light is steady. For studio work or gel use, go for custom or manual Kelvin entry.
Auto White Balance: pros and limits
Auto White Balance is easy and smart. It adjusts to changing lights and daylight. This is great for quick shoots.
But, it struggles with scenes full of one color, like green forests. Mixed lighting can confuse it too. For precise shots, use a different method.
Presets: Daylight, Cloudy, Shade, Tungsten, Fluorescent, Flash
Presets match common light sources. Daylight is near 5200–5600K for neutral sun. Cloudy is warmer for cool skies.
Shade is even warmer for open shade and late-afternoon light. Tungsten cools scenes lit by indoor bulbs, around 3200K. Fluorescent fixes green or magenta casts from tube lamps.
Flash often matches daylight presets but can vary with modifiers. Presets speed up setup when conditions are known.
Custom and manual Kelvin entry for precise control
Custom white balance uses a neutral target like a grey card. Point your camera at it, record a custom WB, and it locks that balance.
Manual Kelvin entry gives you numbers to control. Enter values like 3200K for tungsten or 5600K for daylight. This is great for product work and studio portraits.
white balance for natural colors: a practical in-camera workflow
Getting color right on location saves time in post and keeps skin tones honest. This practical camera white balance workflow focuses on choices you can make while shooting. It keeps results consistent and easy to correct later.
Shooting RAW vs. JPEG — why RAW gives flexibility
Shooting RAW keeps the sensor data without baking white balance into pixels. This lets you correct color fully in Lightroom or Adobe Camera Raw with no quality loss. JPEG applies the camera’s white balance and compresses color, so heavy tweaks will degrade tones and introduce artifacts.
Setting AWB and using quick overrides on location
Start with RAW or RAW+JPEG for client previews. Leave AWB on for mobility, as modern cameras like Sony, Canon, and Fujifilm handle many scenes well. If AWB begins to swing between frames, switch to a preset such as Daylight or Tungsten or enter a Kelvin value for steady light.
When you see a consistent color cast, take one manual step. Use a quick preset or type in Kelvin to lock the cast out. Capture a reference frame with a grey card when time allows; that frame lets you copy white balance across the batch later.
Using live view and white balance previews to check skin tones
Use mirrorless live view to preview how white balance changes affect skin. Many cameras show a WB-applied preview so you can tweak settings before you shoot. In fast-paced shoots prioritize composition and exposure. But, take reference frames when possible to speed batch correction.
Actionable steps: set RAW, test AWB, watch for swings, lock a preset or Kelvin if needed, shoot a grey-card reference. This camera white balance workflow keeps skin tones natural and reduces repeated fixes in post.
Quick fixes on a shoot: grey card and white/grey references
Lock color on set fast to keep skin tones natural. A grey card in one frame makes edits easy later. This trick is great when time is short.
How to use a grey card: one test frame method
Put the grey card where your subject is lit. Fill the frame with it, take one shot, then shoot without it. In editing, use the eyedropper on the card to set a neutral point. This simple step helps keep colors true.
Copying white balance across a batch of shots from the reference frame
Mark the reference frame so it’s easy to find later. Use its white balance for the rest of the shots. Most editors let you copy or sync white balance settings. This makes editing faster and keeps colors natural.
Alternatives when a grey card isn’t available (neutral objects, white balance apps)
Use a neutral object like a white shirt or gray pavement as a quick fix. Smartphone apps like Adobe Lightroom Mobile can also help. Color-checker cards from X-Rite or Datacolor offer more precise color checks.
Quick workflow tips
- Label reference frames during capture so they stand out in import.
- Always light the reference the same way as the subject to avoid shifts.
- When syncing, limit copies to images shot under the same lighting to prevent errors.
| Task | Tool | Risk | Speed |
|---|---|---|---|
| One test frame with grey card | Grey card, camera | Minimal when lit correctly | Fast |
| Use neutral object | White shirt, paper, pavement | Reflectance can alter result | Very fast |
| Phone white balance app | Lightroom Mobile, native Pro mode | Variable accuracy across devices | Fast |
| Color-checker profiling | X-Rite, Datacolor | Requires extra workflow steps | Moderate |
How to avoid common white balance mistakes
Choosing the right white balance saves time and keeps skin tones natural. Use clear routines on set to avoid repeated fixes later. Record Kelvin readings and note the light sources for each scene.
Don’t overcorrect color shifts, as it can make faces look fake. Stop and step away if edits start to drift. Short breaks help you judge tones with fresh eyes.
Batch syncing is fast but risky with changing light. Always check a few frames before syncing globally. Sync small groups with the same Kelvin value if light changes.
Mixed lighting can cause tricky casts. Pick the dominant light or match lights with gels. In studio work, set white balance to interior lamps and expose window areas separately.
For events, choose a consistent reference frame. Accept small shifts instead of chasing perfect neutrality. When local color clashes remain, apply selective adjustments in post.
Keep a simple checklist: note Kelvin, take a reference shot, check skin tones, and rest every 30–45 minutes. This routine helps avoid white balance mistakes and speeds up final delivery.
| Problem | On-set Action | Post-shoot Fix |
|---|---|---|
| Overcorrected skin tones | Pause, compare to grey card, reset camera white balance | Use eyedropper on neutral area, nudge Tint/Temp slightly |
| Light changed mid-shoot | Record new Kelvin, take a fresh reference frame | Sync only to frames with matching Kelvin values |
| Mixed window + tungsten | Decide dominant light, gel flashes or set WB to interior | Local adjustments on window areas or targeted desaturation |
| Color fatigue during editing | Schedule short breaks, review on a calibrated monitor | Ask a second pair of eyes or compare to reference frame |
Quick answer: fix color before editing
Fix white balance on location to save editing time. This helps protect skin tones. Shoot in RAW and use AWB for quick shots.
Take a grey-card reference frame for each lighting setup. If you see a consistent cast, switch to a preset or set manual Kelvin. Use live view to check skin tones before moving on.
Short actionable checklist to implement now
- Shoot RAW for maximum latitude.
- Keep AWB for quick shoots; override when needed.
- Take a grey-card test shot for each lighting setup.
- Use a WB preset or manual Kelvin if casts repeat.
- Use live view to check white balance for natural colors on faces.
Why this short approach prevents repeated fixes in post
Fixing white balance on set gives a neutral base for edits. Copying the reference frame white balance across the batch avoids guesswork. This quick checklist reduces stress and keeps images consistent, so you don’t redo color fixes later.
| Step | Action | Result |
|---|---|---|
| 1 | Shoot RAW | Preserves color data and allows tame adjustments in post |
| 2 | AWB for mobility | Fast shooting with a reasonable starting point |
| 3 | Grey-card reference frame | Reliable neutral target for eyedropper correction |
| 4 | Switch to preset/manual Kelvin | Stops recurring casts when lighting is consistent |
| 5 | Live view skin check | Immediate visual confirmation of white balance for natural colors |
| 6 | Batch copy WB in post | Applies the quick white balance fix across all frames |
Using white balance sliders and eyedropper in post-processing
Start with a reference frame before you tweak anything. Use a neutral target or a properly exposed image from the shoot. This frame guides slider moves and prevents guesswork when you apply white balance for natural colors across a batch.
Temperature and Tint sliders — when to nudge each
Use the Temperature slider to shift the scene along the blue↔yellow axis. If skin looks too cool, nudge warmer. If the scene is too warm, pull toward blue. Use the Tint slider only for green↔magenta casts caused by fluorescent lights or mixed gels.
Make small adjustments. Large jumps can clip highlights, crush shadows, or create banding. Watch neutral areas and highlight detail while you move sliders.
Eyedropper tool technique: pick a neutral area, refine skin tones
Activate the eyedropper white balance and click a neutral grey or white in the reference frame. If you used a grey card that frame will be the most reliable. Apply those settings to the rest of the shoot.
If subjects show a tint, refine Temperature and Tint gently. Check known skin tone charts or alternate images from the same session. Tweak until skin looks natural without losing color accuracy in clothing or product shots.
When to accept a creative white balance vs. true-to-life correction
Accept a creative white balance when it enhances mood, such as a warm golden-hour look for portraits. Confirm that clients or brands approve any deliberate shift before final delivery.
Choose true-to-life correction when product color, skin accuracy, or editorial integrity matter. Use the eyedropper white balance first, then minor slider nudges to preserve both realism and intent.
Batch workflow best practice
- Set eyedropper white balance on the reference frame.
- Copy the white balance sliders values to the group.
- Inspect highlights and shadows on several key images to ensure consistent white balance for natural colors.
Phone and mirrorless tips for accurate color on the go
Fast shoots need quick decisions to keep colors natural. Use simple checks to keep white balance consistent. This is important when moving fast between locations or covering events with changing lights.
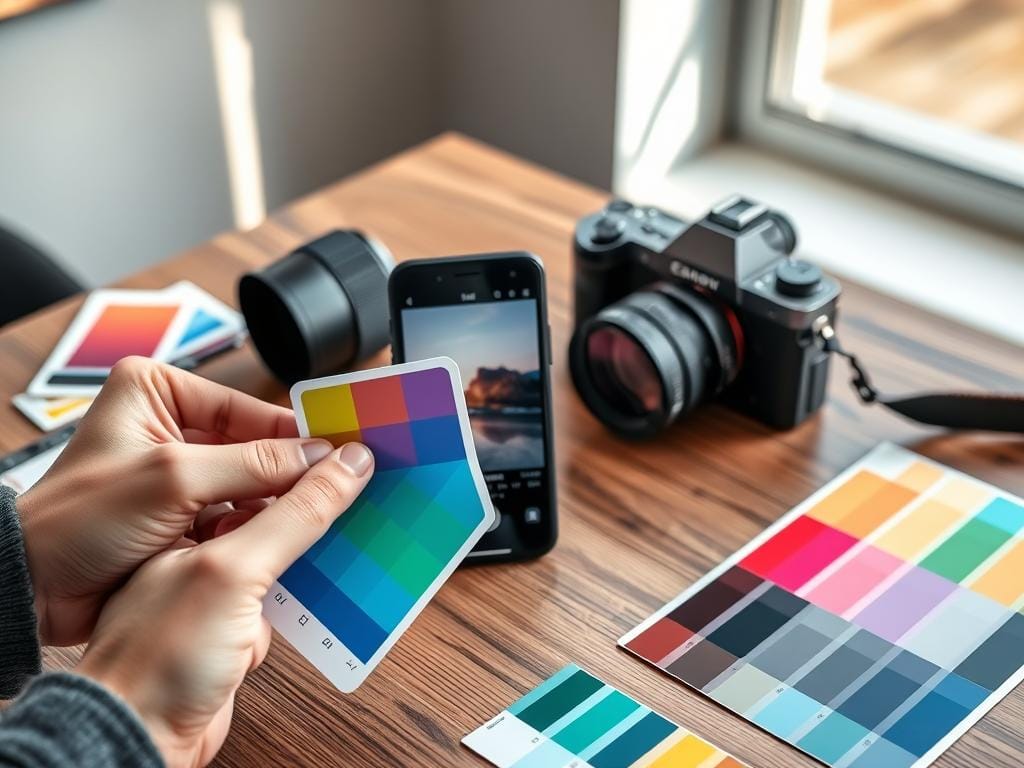
Many phones have Pro or Manual mode. Here, you can lock white balance. If your app lets you enter Kelvin, set it for the light you’re in. If not, use a custom preset for indoor or outdoor light. These tips save time and reduce editing later.
Pro and manual phone workflows
Shoot DNG RAW with apps like Adobe Lightroom Mobile or ProCamera. RAW keeps white balance adjustments for later. Use the camera’s warmth slider only for previews. Keep the file neutral for editing.
Mobile RAW and quick editing
Capture a neutral frame at the start of a scene. A small grey card fits in a pocket. It’s a reliable sample for later.
When syncing settings in Lightroom, that reference makes batch corrections fast and accurate.
Event and candid tactics
For fast shoots, leave AWB on to keep pace. Take a single reference frame when lighting is stable. Switch to a preset or enter a Kelvin value for indoor shots.
Mirrorless white balance tools help too. Use live view WB preview on Sony, Fujifilm, Canon, or Nikon to check skin tones instantly. Quick in-camera adjustments on mirrorless bodies reduce surprises in post.
| Situation | On-phone action | Mirrorless action |
|---|---|---|
| Bright daylight | Set daylight preset or 5200–5600 K, shoot DNG | Use live view preset, verify skin tones, shoot RAW |
| Warm tungsten interiors | Choose tungsten preset or 2800–3200 K, take reference frame | Enter Kelvin, preview on LCD, lock WB if stable |
| Mixed window + artificial | Capture neutral card, use AWB for speed, correct in post | Position subject to minimize casts, use custom WB or reference |
| Candid/events | Keep AWB, grab neutral shot occasionally, batch fix later | Use quick presets, monitor live view, switch to manual if steady |
For more on white balance basics and practical methods, see this white balance introduction. Use these phone and mirrorless tips to keep colors natural on the go.
Lighting control strategies to simplify white balance
Good lighting control makes white balance easier. First, decide the look you want. For product or editorial, aim for neutral light. For mood-driven portraits, choose warm or cool light on purpose.
Record the Kelvin of each lamp. This helps you repeat settings on future shoots.
Using gels and consistent light sources to match color temperature
Keep a small set of CTO and CTB gels. Also, have a light meter that reads color temperature. Use gels on strobes to match daylight or tungsten.
When strobes and daylight match, mixed casts go away. This makes white balance easier to set in-camera.
Positioning subjects relative to mixed light to minimize casts
Place the subject so the dominant light falls evenly. Avoid strong tungsten spill on one side with daylight on the other. Move or flag lights to prevent cross-casting.
If you must keep mixed sources, choose one temperature as primary. Expose and set white balance to that key source.
When to embrace ambient warmth (creative decision) vs. neutralize it
Keep ambient warmth for golden-hour or candlelit portraits. This adds mood. For accurate skin tones in commercial, neutralize warmth by adjusting gels or camera white balance.
Gels for color let you push creative warmth. This way, you keep control over metering and repeatability.
Practical checklist:
- Carry a compact gel kit and a color-temperature meter.
- Note Kelvin values in your shoot log for repeatable setups.
- Decide the primary light source before framing and set lighting control white balance.
Real-world checklist: prepare, shoot, and verify
Use this checklist to get ready for white balance before you start. It helps keep skin tones right during the shoot. And it makes fixing colors easier after.
Before you start, make sure your camera is set to RAW. Charge your batteries and bring extra memory cards. Also, pack a grey card or X-Rite ColorChecker.
Remember the light sources and their Kelvin values. Pick an AWB or preset that matches the scene. This way, you’re close to the right color from the start.
During the shoot, check your white balance often. Place the grey card in the same light as your subject. Take a reference frame for every lighting change.
Use live view to check skin tones and test frames. If the light changes, retake the reference. Log the new Kelvin value.
After the shoot, make editing easier. Import RAW files and find your reference frames. Use the grey card’s eyedropper to set white balance for similar lights.
Adjust Temp and Tint on key portraits. Take breaks to avoid getting tired of adjusting colors.
Try this: shoot the same scene with tungsten and daylight presets. Then, compare the results. Save your preferred setting in a camera custom slot. This makes it easy to use at future shoots.
Tag your sessions with the dominant Kelvin or preset. This helps your team understand your original plan.
- Downloadable shareable: turn this checklist into an Instagram graphic for easy sharing.
- Gear checklist: RAW, batteries, cards, grey card/ColorChecker, lens cloth.
- On-set routine: reference frame per light, live view skin check, histogram review.
- Post workflow: import RAW, eyedropper on reference, copy/sync WB, tweak Temp/Tint.
- Time-saver: name files with dominant Kelvin or preset for team clarity.
| Stage | Action | Why it matters |
|---|---|---|
| Pre-shoot | Set RAW, pack grey card, note expected Kelvin | Prepares white balance checklist so captures start close to natural tones |
| On-shoot | Shoot grey card per light, test frames, use live view | Ensures white balance for natural colors under each lighting condition |
| Post-shoot | Import RAW, eyedropper on reference, sync WB, refine skin tones | Speeds batch editing and preserves accurate skin tones across images |
| Practice | Compare tungsten vs. daylight presets, store favorites | Builds quick recall presets to prepare white balance faster on set |
| Workflow tip | Tag files with dominant Kelvin or preset in metadata | Communicates original intent to assistants and retouchers for consistency |
Shareables and calls to action
Share two Instagram-ready tips for white balance. First, a checklist card with RAW, AWB, grey card, preset, or Kelvin, and eyedropper in post. Second, a short message: “Saw you struggle with orange/blue skin tones—try shooting RAW, grab a grey card, and use AWB; I can show you the quick eyedropper trick in Lightroom.”
Include a small feature image brief for the web editor. Use candid shots of natural adults 25+, US/AU feel, neutral lighting, no text on image. Add the white balance tips to captions and save as a highlight for followers. These assets help promote white balance for natural colors and make the guidance easy to repost and teach on the go.
Brief disclaimer: these suggestions focus on evergreen photographic techniques; results vary with gear and conditions. References: Mastering White Balance; Photography Explained (Rick McEvoy). Practice regularly and follow on Instagram for visual examples.
Stay focused,
Ray Baker.
FAQ
What is the quickest way to fix orange or blue skin tones on location?
Why does white balance matter for natural skin tones photography?
How does color temperature (Kelvin) affect perceived skin tones?
What are typical Kelvin values for common light sources?
When is a warmer or cooler white balance a creative choice?
What are camera white balance settings and when should I use them?
Should I shoot RAW or JPEG to preserve white balance flexibility?
How do I use a grey card to set white balance?
What if I don’t have a grey card—what are alternatives?
How do the Temperature and Tint sliders work in post-processing?
What is the eyedropper technique and when should I refine further?
How can live view on mirrorless cameras and phones help with white balance?
How do I handle mixed lighting (daylight plus tungsten) on set?
What common white balance mistakes should I avoid?
What is a short actionable checklist I can use on every portrait shoot?
How do I batch-apply white balance correctly in post?
Any practical gear or pre-shoot steps that save time later?
Can I control white balance on my phone and get reliable results?
How do gels and consistent lighting strategies simplify white balance?
What quick social shareables should I post to teach white balance tips?
Where can I see visual examples of Kelvin differences and grey-card workflows?
Any final quick tip for events or fast-paced shoots?
Is there a brief disclaimer and resources I should know?
Struggling to get consistent photography clients?
Get More Photography Clients