
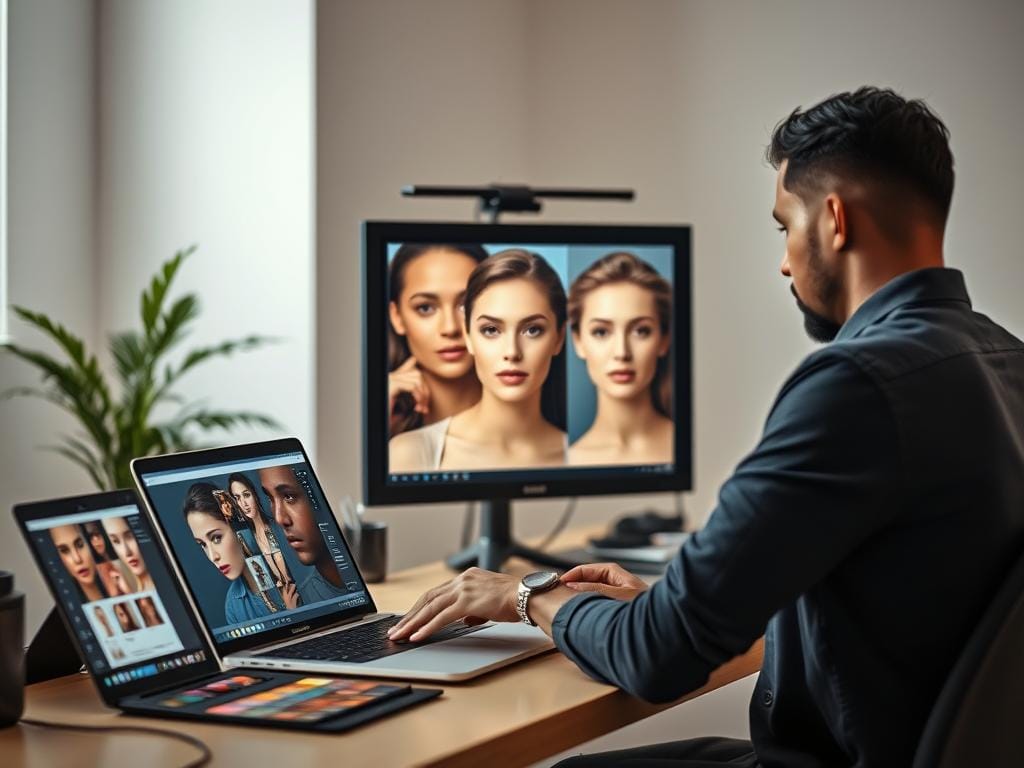
Do your edits ever leave clients asking, “Why does my neck look different from my face?” This problem comes from bad white balance, too bright spots, or changing colors too much. It’s the fastest way to lose trust and get no more work.
Start with RAW files in Capture One to fix colors and brightness. Then, use Photoshop only for small fixes. This way, you avoid changing skin texture and keep the look natural. Clients will love what they see on Instagram and in print.
Key Takeaways
- Begin every edit in Capture One with RAW files or tethered capture for accurate white balance and session control.
- Prioritize color and exposure correction before creative grading to keep natural portrait editing believable.
- Use local layers and masks to even out skin without affecting eyes, lips, or hair.
- Leverage Color Editor and Uniformity (Capture One) or HSL/Color Mixer (Lightroom) to reduce blotchiness subtly.
- Export social-ready variants (Instagram 4×5, web) and a high-bit PSD for Photoshop retouching when required.
Quick answer: fast skin tone editing tips that fix the problem
Quick answer (60-90 words): Start with RAW files. Use a gray card or natural light to set white balance. Then, adjust exposure based on mood.
Work on skin areas with local layers and masks. This keeps lips and eyes safe. Use the color picker to match skin tones. Adjust Uniformity to check your work, then dial back for a natural look.
Export files for social media like Instagram 4×5. Save a PSD for Photoshop if needed for more detailed work.
Start with strong examples to quickly understand. Instagram before/after shots help clients and editors see changes fast. They also make it easy to share your editing choices.
Begin with RAW files in Capture One or Lightroom. Set white balance and adjust exposure to match the scene’s mood. Use local masks and layers to work on different parts of the face.
Sample skin tones with the color picker. Use Uniformity sliders to even out color, saturation, and lightness. Make Uniformity bold to check your mask, then reduce it to keep skin texture.
Refine masks to protect eyes, lips, and hair. Remove spill and soften edges for a natural look. For detailed texture work, export a PSD for Photoshop and return to color adjustments.
Finish with small Color Balance changes and luminosity curves for depth. Add a bit of grain to avoid a too-smooth look. Deliver your work quickly and keep a preset for Instagram 4×5 to ensure consistent client-ready galleries.
Why getting skin tone right matters for natural portrait editing and client satisfaction
Getting the color of the skin right is more than just looks. It builds trust with clients. Pictures that look good together do better on Instagram and in galleries.
Emotional impact is quick. A wrong skin tone can make a client doubt your work. Humans naturally read faces, so small changes in tone can change how we see health and warmth.
Keeping a consistent look is key. Use folders and workflows to keep things steady. This way, clients can see a clear brand.
Start right at the beginning. RAW files keep more color data for editing. Set white balance and exposure right to make edits easier.
For small fixes, use Uniformity sliders. Make a local layer for skin and adjust colors carefully. This keeps the look natural.
How you work affects clients. Tethered review lets you fix things right away. Keeping things organized and clear helps too.
Learn more about editing skin tones in this guide: achieving perfect skin tones. Use these tips for natural and reliable results.
Preparing your files: RAW workflow and session organization for consistent results
First, decide how you’ll capture and store files. This keeps edits the same from start to finish. A clean system makes reviewing faster, cuts down on mistakes, and keeps skin tones the same in every photo.
Use a session-first approach. This means grouping RAW, PSDs, and exports together. It makes moving between apps easy.
For live shoots, tethered shooting is best. It lets clients see photos right away. Capture One is great for this because it shows images in a folder instantly.
Teams can check poses and adjust colors live. This ensures the final photos look just right.
Card import is good for backup. Make sure import settings match your session structure. This keeps all your photos in order, even when you’re working fast.
Always work with RAW files if you can. They keep more color and detail. This means you can fix photos better without losing quality.
Have a plan for keeping track of versions. Save the original RAWs, label PSDs, and store JPEGs in their own folders. This stops you from using the wrong version and makes sharing photos easy.
Use simple names and export settings for each type of photo. Capture One lets you set up export presets for different sizes. Lightroom helps keep everything organized, too.
| Task | Best Practice | Benefits |
|---|---|---|
| Shooting method | Tethered for reviews; card import for backups | Immediate feedback; reliable archive |
| File type | Store RAW as masters | Full color depth; easier Color Editor corrections |
| Session layout | One session folder with subfolders for PSD and exports | Portability; clear version control |
| Naming | Use descriptive names and date codes | Quick search for social-ready and client galleries |
| Export recipes | Preset for web, print, Instagram | Consistent outputs; saves time |
| Cross-app workflow | Mirror folders for Lightroom skin tones and Capture One | Smooth round-trip editing; consistent color between apps |
White balance and exposure: foundational skin tone editing tips you can’t skip
Start with a reference that ties the shoot to reality. Use a gray card or a natural reference photo when possible. This sets a reliable baseline for color. It keeps white balance skin tone adjustments honest while you preserve the scene’s mood.
Match exposure to feeling, not to a number. For beauty work, dial back highlights to keep texture. For editorial or golden-hour portraits, warm the tones after a neutral baseline. This keeps the subject looking natural. These exposure skin tips help you balance detail and atmosphere.
Use HDR tools for controlled recovery. Pull down blown highlights and lift the deepest shadows with restraint. HDR skin recovery works best when applied selectively. This way, you restore detail without losing dimensionality.
In Lightroom and Capture One, begin with a neutral profile and small global moves. Targeted local adjustments refine what the global sliders started. Lightroom skin tones respond well to modest Temp/Tint shifts and careful highlight recovery before any heavy color grading.
Practical checklist:
- Capture: include gray card shots and a few natural references for each session.
- Base edit: set white balance skin tone from the gray card, then nudge for mood.
- Exposure: correct for retained detail; use exposure skin tips to protect highlights in beauty shots.
- Recovery: apply HDR skin recovery selectively, keep local contrast to avoid flattening.
- Finish: check Lightroom skin tones and export proofs for web and print presets.
Local adjustments before global changes: selective edits that preserve character
Start with targeted work to protect the subject’s natural look. Small, selective edits let you fix problem areas without flattening expression or skin texture. Use clear layer names so you can track edits like “Skin tone” or “Backdrop pink”.
Masking choices shape the final photo. In Capture One, the shift-select mask technique traces edges quickly, then using Fill mask creates a broad base to refine. Erase mask is essential to protect lips, eyes, and hair from unintended color or smoothing shifts.
Layers give you control when subtlety matters. Create Capture One layers for selective uniformity adjustments to even tone while keeping texture. Global sliders set mood across the frame, but layering keeps character and avoids overcorrection.
Edge cleanup prevents halos and fake-looking transitions. After painting a mask with a brush, erase spill around hard edges and use feathering sparingly. Open the Color Editor to view selected ranges and confirm that your mask targets only the intended tones.
Workflows differ by app, so match tools to the job. Use Lightroom local edits for quick feathered gradients and spot fixes during culling. Move to Capture One layers for session-level precision when you need advanced masking skin editing and fine color selection.
Keep edits review-ready for social platforms. Export masked before/after images that look natural on Instagram and client galleries. Small, well-named layers and careful masking skin editing speed approvals and reduce revision rounds.
| Task | Best Tool | Why it helps |
|---|---|---|
| Trace subject edges fast | Shift-select mask (Capture One) | Creates a precise base mask to refine without losing hair or background detail |
| Exclude lips and eyes | Erase mask brush | Prevents color shifts and preserves natural highlights in small features |
| Even out minor blotches | Capture One layers | Selective uniformity reduces blotchiness while retaining skin texture |
| Quick shoot-to-share tweaks | Lightroom local edits | Fast, intuitive tools for on-the-go adjustments and client previews |
| Check color range precision | Color Editor panel | View and refine selected color ranges to avoid spill and halos |
Using Color Editor and Uniformity tools to even out tone shifts
Start by picking a small, neutral face area with the Color Editor. Look at the color range to see what pixels are chosen. This helps find true skin tones for adjustments and keeps eyes, lips, and background safe in Capture One.
Advanced Color Editor: selecting skin ranges with the color picker
Go to the Advanced tab and click the color picker on natural skin. Use the “view selected color range” overlay to check your sample. If it hits hair or clothes, erase those spots or make the sample smaller until only skin shows.
Uniformity sliders: hue, saturation, and lightness to reduce blotchiness
Use Uniformity tools by adjusting Hue, Saturation, and Lightness a little at a time. Move Uniformity Hue to 100 to see selection edges, then reset and use small changes. Focus on red and yellow areas to even out skin tone without losing natural look.
Practical workflow: sample, exaggerate to check selection, then dial back for natural results
Start by sampling a natural cheek spot, then make Uniformity more extreme to see if it’s right. Use the Erase mask tool to protect makeup, eyes, and edges. After checking, lower settings until changes are almost invisible but work well. This keeps the portrait natural and full of texture.
- Sample small, confirm overlay, erase problem areas.
- Exaggerate to test, then return to subtle values.
- Use layers or local masks for different face zones when needed.
Working with Lightroom skin tones and Capture One tools: cross-app practical tips
Working between Capture One and Lightroom can make your portrait work better. Start with neutral profiles and consistent exports. This way, clients always see the same results.
Use Instagram to show how Lightroom skin tones and Capture One exports differ. This helps keep things clear and open.
Equivalent tools for matching color
Lightroom’s HSL and Color Mixer are similar to Capture One’s Color Editor and Uniformity sliders. Use Capture One’s Color Picker for precise adjustments. Lightroom’s targeted adjustments are great for quick fixes.
Sample a range, push the correction, and then ease back for natural results.
Start with profiles and lens corrections
Apply camera profiles and lens corrections early. This removes color casts and distortion. Capture One has hundreds of profiles for a neutral base in portrait editing.
Apply the same logic in Lightroom for a consistent color foundation.
Round-trip PSD workflow for deep retouching
Export a 16-bit Adobe RGB PSD from Capture One for Photoshop retouching. Choose “Crop as Path (PSD)” to keep canvas and crop info. After detailed skin cleanup in Photoshop, save the PSD back into Capture One for final grading.
Practical export and proofing notes
When re-importing edited PSDs, keep original Capture One adjustments. This helps with final color balance. Create export recipes for social and web to match expectations.
Comparing Capture One vs Lightroom in client work
For tight color control, choose Capture One for complex color picks. Use Lightroom for speed and batch HSL fixes. Mix both for the best portrait editing workflow.
Skin texture and clarity control for natural portrait editing
Good skin texture editing makes faces look real and not fake. Start by fixing the tone, then protect the details. After that, add texture work. This order keeps the subject’s character while making the face look polished.
Clarity vs Structure: subtle enhancement without a plasticky look
Choosing between Clarity and Structure changes how midtones and details look. Clarity makes midtones stand out but can make skin look harsh if too much is used. Structure keeps midtones soft and adds fine detail, making portraits look more natural.
Use both Clarity and Structure carefully. Add Structure at low values to keep texture. Use Clarity only where needed, like around eyes or hair. Check at 100% view to avoid unwanted effects.
Using grain to mask over-retouch and keep an analogue feel
Adding grain makes images feel real again after too much smoothing. Use film-like grain in the final export to hide any over-retouching. This matches what clients see on Instagram and in print.
Choose grain size and roughness based on the image and where it will be seen. For editorial and beauty, use finer grain. For lifestyle and cinematic looks, choose coarser grain and a bit more strength.
Retouching order: tone, texture, then final color grade
Follow a three-step process: fix exposure and skin tones first. Then, work on texture with frequency separation or low Structure. Finish with a color grade using curves and Color Balance to set the mood.
| Step | Primary Goal | Tools/Notes |
|---|---|---|
| 1. Tone | Neutral base and correct exposure | White balance, exposure, highlight recovery, Lightroom skin tones for subtle shifts |
| 2. Texture | Preserve pores and reduce blemishes without blur | Frequency separation, low Structure, spot healing, avoid heavy Clarity |
| 3. Grain & Grade | Unify finish and set final mood | Subtle grain in export, Color Balance, curves, match Instagram preview for US/AU clients |
Color balance and final grade: warm highlights, cool shadows for depth
Think like a movie director when grading portraits. Use gentle contrast and small color shifts to add depth. This keeps the subject’s skin looking natural.
Make edits softly. Cool shadows deepen contours. Warm highlights on cheekbones and hair suggest natural light. These choices make the subject pop against the background.
Use the Color Balance tool for small color changes. Add a bit of blue or teal to shadows and warm highlights. Always check midtones to keep the skin looking right.
Curves are great for contrast and color. The luminosity curve adds contrast without changing color. RGB curves can change skin tone, so use them carefully.
Make different versions for clients to choose from. Offer a color and black-and-white version. Share these on Instagram and your website.
Export images in different sizes for easy sharing. Include a soft-graded color version. Keep the final look simple unless the client wants something more dramatic.
| Step | Tool | Goal | Typical Adjustment |
|---|---|---|---|
| Shadow shaping | Color Balance (shadows) | Add depth without skin shift | Slight cool tint, -2 to -6 on hue wheel |
| Highlight warmth | Color Balance (highlights) | Enhance natural light on skin | Small warm tint, +2 to +6 on hue wheel |
| Contrast control | Luminosity curve | Increase contrast while preserving color | Soft S-curve on luminosity channel |
| Global mood tweak | RGB curves | Warm or cool entire frame | Minor curve shifts; preview for hue shifts |
| Client options | Variants system | Provide choices for review | Color, subtle grade, black-and-white; Instagram 4×5 export |
Export recipes and proofing: deliver consistent skin tones across platforms
First, make different export recipes for each place. Think of social media, websites, client galleries, and prints as unique outputs. This way, Lightroom and Capture One edits look the same on all devices. Using specific presets saves time and cuts down on errors.
Make a special recipe for Instagram. Crop to 4×5, change to sRGB, and add grain and sharpening for mobile. Test it on a real phone to make sure skin tones look natural.
For websites and client galleries, use sRGB JPEGs at 72-150 ppi. Make midtones a bit lighter so faces look good on bright screens. For prints, export TIFF or PSD in Adobe RGB or ProPhoto RGB. Include layered PSDs for future edits.
When you export PSDs, TIFFs, and JPEGs, name them clearly. Add the client’s name, session date, and version number. This stops you from using the wrong file by mistake. Keep a folder with the master TIFF/PSD and final web JPEGs for easy tracking.
Use proofing tools in Capture One or Lightroom for each export. Change your proofing profile and preview at final size to check colors. This helps catch any color changes before you send the files.
Make a checklist for proofing: resolution, color space, crop, grain, and sharpening. Also, check Lightroom skin tones before you export. This saves you from having to re-export later.
Include grain and final resize in your recipes to keep texture and hide small retouches. Export both a print-ready TIFF/PSD and a web-ready JPEG. This way, clients get high-quality files and you keep the skin tone you approved.
- Instagram 4×5 export: sRGB, crop to 4×5, mobile test, light sharpening, final grain.
- Client gallery: sRGB JPEG, labeled versions, medium compression for fast loading.
- Print masters: TIFF/PSD, Adobe RGB or ProPhoto, layered PSD for archival edits.
Client communication and previews: managing expectations and showing natural edits
Clear communication is key for smooth client relationships. Start with a note explaining your editing approach. This sets the stage for feedback and limits changes.
Shareables
Make a list of six quick skin tone editing tips. Add a one-line message for Instagram captions. Use simple language so everyone gets it.
Presenting before/after
When showing before/after shots, add context. Mention changes like white balance and skin uniformity. This helps clients understand the editing process.
Delivering variants
Offer three main options: natural color, warm grade, and black-and-white. Label each variant clearly. This keeps things organized and professional.
Gathering feedback
Ask specific questions when sending proofs. For example, “Do you prefer a warmer tone or natural?” This helps focus feedback and avoids endless edits.
Proofing and social-ready copy
Include a feature image in the client gallery. Add a caption and tips list for quick sharing. This encourages clients to post and gives credit for your work.
Common pitfalls and troubleshooting: fix common skin tone issues quickly

Small color errors can ruin a portrait’s mood. Use quick visual checks and targeted fixes to keep edits believable. The steps below help when you need to fix skin tone casts fast or when troubleshooting skin tone across a session.
Green or magenta casts from mixed lighting and easy fixes
Mixed ambient light often gives skin a green or magenta tint. Sample a neutral area with the Color Picker, then apply a local white balance or Color Balance layer. In Capture One, use the Color Editor to target problem hues. In Lightroom skin tones, try the Temp/Tint brush on a small patch and match to a gray card or inner cheek.
Dealing with uneven saturation across faces, necks, and hands
Uneven skin saturation shows up when light falls unevenly. Create local layers for face, neck, and hands. Use Uniformity sliders or the HSL/Color Mixer to nudge saturation without flattening texture. Exaggerate the selection briefly to confirm coverage, then pull adjustments back for a natural blend.
Quick checks: histograms, vectorscope, and natural reference points
Always run three quick checks: histogram for clipping, vectorscope for hue spread, and a neutral reference like the inner cheek or behind the ear. If a vectorscope shows a skew toward green or magenta, target that band in the Color Editor. For Lightroom skin tones, use the color range preview and compare small crop previews on mobile to ensure consistency.
Share simple before/after thumbnails on Instagram to answer common client FAQs. Ask clients to view crop previews on different devices. These small checks speed troubleshooting skin tone and reduce back-and-forth on uneven skin saturation.
Disclaimer and references
This article talks about how to edit skin tones in photos. It gives tips for natural-looking results. But remember, colors can look different on different cameras, monitors, and printers.
Always check how colors look before you share them. For more specific advice, check out Capture One and Lightroom. They can help you match your tools and settings.
For tips, we looked at Jonas Nordqvist / Capture One blog, Capture One’s own guides, and Instagram. We also made two shareables to help you talk to your clients.
Start with these tips and test them on different devices and prints. Keep working, Ray Baker.