Sharp Eyes in Portraits: The Detail That Makes Photos Feel Professional

Ever feel upset when a photo looks great but the eyes are blurry at full size? This problem, known as soft eyes, can ruin a photo. But, it’s often easy to fix with the right techniques and tools.

To solve this, focus on the eyes first. Use back-button AF and eye-tracking features. Also, prefocus when you can and pick the right settings for aperture, shutter speed, and ISO. With a sharp lens, you’ll get clear eyes in portraits every time.

Sharp eyes grab the viewer’s attention and make portraits feel professional. If the eyes are blurry, the photo loses its power, even with great composition and color. Modern cameras like the Sony α7R III and sharp lenses like the Sony 85mm f/1.4 G Master help make sharp eyes a sure thing.

Key Takeaways

  • Always prioritize the eyes: they anchor emotion and impact.
  • Use back-button AF and Eye AF to boost your portrait success rate.
  • Choose sharp portrait settings: good aperture, fast shutter, and ISO.
  • Opt for lenses known for sharpness, many primes are better than zooms.
  • Modern mirrorless cameras with eye-tracking make sharp eyes in portraits more reliable.

Why sharp eyes in portraits change how people feel about your photos

Eyes help us read emotions. Sharp details in the iris and catchlight make images pop. This creates a strong emotional bond with the subject.

Photographers use sharp eyes to focus attention. A sharp eye in a photo draws the viewer’s eye. They start to see the subject’s mood and story.

The psychology of eye contact in portraiture

Humans look for faces and then eyes. A sharp gaze in a photo feels like real eye contact. This builds trust and empathy.

Adding catchlights and highlights makes photos feel alive. These small details help us read emotions and feel the moment.

How sharp eyes improve perceived professionalism

Sharp eyes show you’re skilled. Clients and editors notice image quality fast. Clear eyes make the whole photo look better.

Using portrait focus tips shows you’re in control. This makes your portfolio look better and clients trust you more.

Real-world examples from modern autofocus advances

Modern cameras like Sony’s α7R III have eye-tracking. This helps get sharp photos even when subjects move. It makes photo shoots easier and faster.

Using an 85mm f/1.4 lens with Eye AF works well. Many photographers get sharp photos at wide apertures. This makes photo shoots more efficient.

Knowing how eyes work and using the right camera tools is key. This helps you take photos that touch people’s hearts and look professional.

Understanding focus systems and eye autofocus for portraits

Modern focus systems change how photographers work. Eye autofocus and eye-tracking autofocus let you focus on composition and connection. This frees you to enjoy the moment while the camera handles the details.

How eye autofocus works and why it’s a game-changer

Eye autofocus finds facial features and locks onto the eyes. It works even when the face is partly hidden. This makes it great for capturing sharp portraits.

It’s perfect for using very shallow depth of field lenses. You can focus more on the mood and pose of your subjects. This makes your portraits even more special.

Camera models and features to look for

Look for second- and third-generation mirrorless autofocus systems. Sony α-series bodies like the α7R III and α9 were early leaders. Now, Canon EOS R-series and Nikon Z-series models offer similar performance.

Key features include reliable eye autofocus and wide AF-point coverage. Strong AF-C performance for moving subjects is also important. Make sure the camera supports back-button AF and has flexible AF area selection.

Settings that optimize Eye AF

Enable Eye AF or Face + Eye Detection in the camera menu. Use AF-C for subjects that move. If needed, switch to a single-point or small zone for better focus.

Map Eye AF to a dedicated button for quick access. Choose lighting that adds contrast to the face for faster focus. These tips will help you get the best results with eye autofocus.

Portrait focus tips: choosing focus area and mode

Use AF-C (continuous AF) for moving subjects or burst shots. Set back-button AF to focus without pressing the shutter. Hold the back-button AF to lock focus on an eye, then release to refocus.

Decide your focus area before taking the photo. Use single-point or spot AF to focus on the nearest eye. Letting the camera choose is good when things are unpredictable.

Spot AF is the smallest and most precise. Use it for very shallow depth of field or long lenses. Single-point AF is a bit larger and more forgiving.

Use prefocusing for subjects walking toward you. Focus on a mark and wait for them to enter. For group shots or gentle motion, use small zone AF to track faces.

Follow a simple workflow: compose, place the AF point on the nearest eye, activate back-button AF, adjust framing and exposure, then fire. For critical moments, use high-speed drive and short bursts to capture sharp frames.

Practice these tips with different lenses and lighting. Using the right focus area and back-button AF will improve your portraits. You’ll get more sharp, professional-looking photos.

Camera settings that protect eye sharpness in portraits

To get sharp eyes in portraits, start with your camera settings. Choose values that help focus well and keep details clear. Here are some easy tips for any photo shoot.

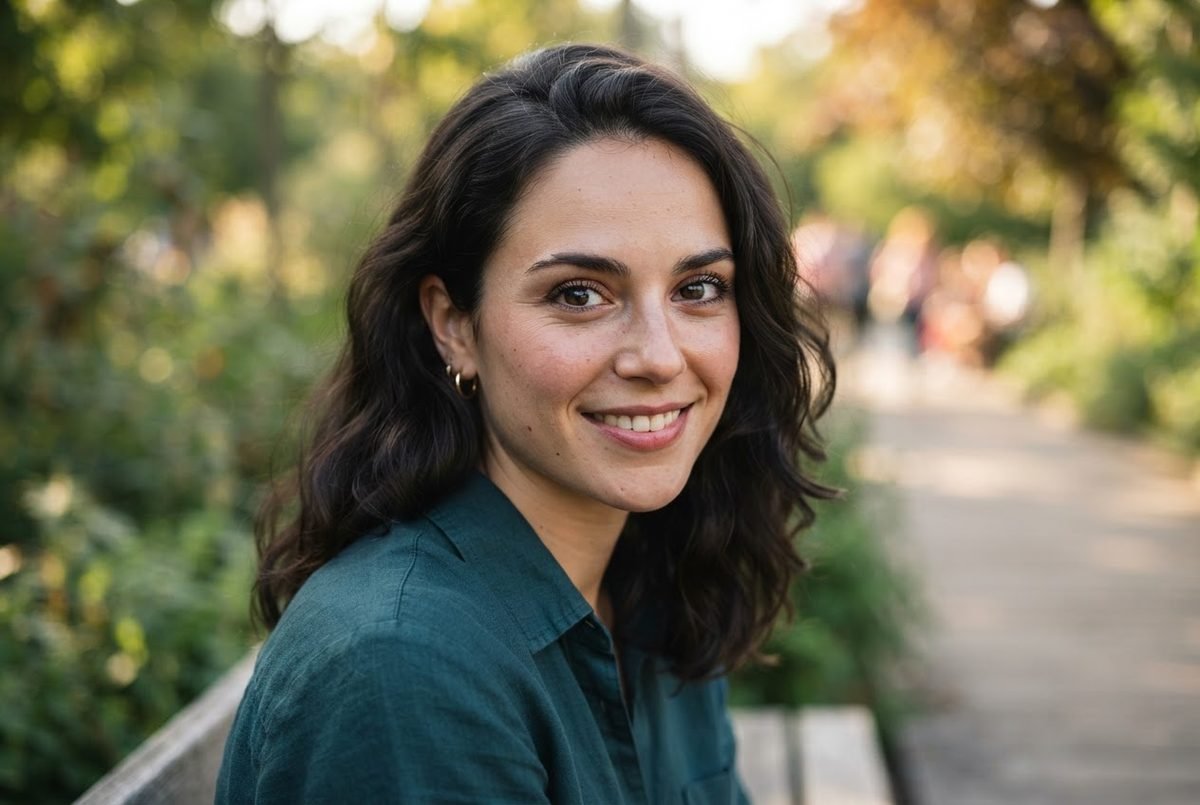
A stunning close-up portrait of a person with sharp, attentive eyes, the focal point of the image. The subject, dressed in professional business attire, gazes directly into the camera with a piercing look that conveys confidence and depth. Set against a softly blurred background of muted colors, enhancing the focus on the subject’s expressive eyes. The lighting is dramatic yet soft, highlighting the contours of the face and creating a warm, inviting atmosphere. Shot with a 50mm lens to capture fine details, the angle is slightly below eye level, emphasizing the sharpness and clarity of the eyes. The overall mood exudes professionalism and intrigue, illustrating the importance of eye detail in portrait photography. Stay focused, Ray Baker.

Optimal aperture choices for portrait sharpness

Wide apertures like f/1.2–f/1.4 make backgrounds soft but can miss focus. For portraits, stop down one to two stops. This keeps your subject sharp and the background soft.

Lenses are sharpest one to three stops down from wide open. For tight shots, use f/4–f/5.6. This keeps both eyes sharp. For groups, f/5.6–f/8 works best.

Shutter speed rules to avoid motion blur

Use the reciprocal rule for shutter speed: 1/(effective focal length). For handheld shots with an 85mm lens, 1/125s is safer than 1/80s. For moving subjects or kids, go for 1/500s or faster.

Stabilized cameras like Sony a7 IV or Canon R6 help with shake. But, they won’t freeze moving subjects. Always choose the right shutter speed for sharp portraits.

ISO strategy and noise management

Start at ISO 100 and only go up if needed. Modern cameras handle high ISOs well. But, too much noise reduction can soften eyes.

Know your camera’s best ISO range and set limits in auto ISO. This keeps your portraits sharp. If you must raise ISO, stop down the aperture or add light first.

Match aperture, shutter, and ISO to keep eyes sharp and avoid blur. If you use very shallow depth, raise shutter speed or stop down first. Then, avoid heavy sharpening in editing.

Sharp portrait settings: lens selection and lens sweet spots

Choosing the right lens makes eyes in portraits sharp. Lens choice affects sharpness, depth of field, and background. Learn how prime vs zoom sharpness, lens sweet spots, and recommended lenses impact your photos.

Prime lenses are often the best for sharp eyes. A 50mm f/1.4 or 85mm f/1.4 has wide apertures and soft backgrounds. This makes the subject’s eyes stand out.

High-end zooms can also be great. A 24-70mm f/2.8 or 70-200mm f/2.8 is flexible and sharp when stopped down a bit. Use these focal lengths for the best eye detail.

Most lenses are sharpest one to three stops down from their max aperture. The sweet spot is usually between f/4 and f/8. Test your lens to find where it performs best for portraits.

Calibration is key for sharp focus. If your lens misses, adjust your camera or send it back. Cheap filters and dirty lenses can ruin detail. Keep your glass clean and use filters wisely.

Choose lenses based on your style. For extreme blur and sharp eyes, use fast primes. For versatility, pick a pro zoom and stop down to the sweet spot.

Here’s a quick guide to common portrait lenses and their performance.

LensTypeTypical Sweet SpotStrengths for PortraitsNotes
Sony FE 85mm f/1.4 GMPrimef/2–f/4Outstanding subject isolation; sharp eyes in portraits at f/2Excellent rendering; heavy but highly resolving
Canon RF 85mm f/1.2 / EF 85mm f/1.4Primef/2–f/4Creamy bokeh; reliable eye separationTop choice for studio portraits
Nikon 50mm f/1.8 / 50mm f/1.4Primef/2–f/5.6Affordable; sharp eyes in portraits when focused wellGreat value for learning lens sweet spot
Canon/Nikon/Sony 24-70mm f/2.8Zoomf/4–f/8Versatile framing; very sharp at mid focal lengthsStop down slightly for best eye detail
Canon/Nikon/Sony 70-200mm f/2.8Zoomf/4–f/8Long reach; strong subject separation and sharpnessExcellent for headshots at longer focal lengths
Affordable 50mm f/1.8 (various brands)Primef/2–f/5.6Low cost; surprisingly good sharp eyes in portraitsLightweight; great starter lens

Camera stability and technique to protect eye detail

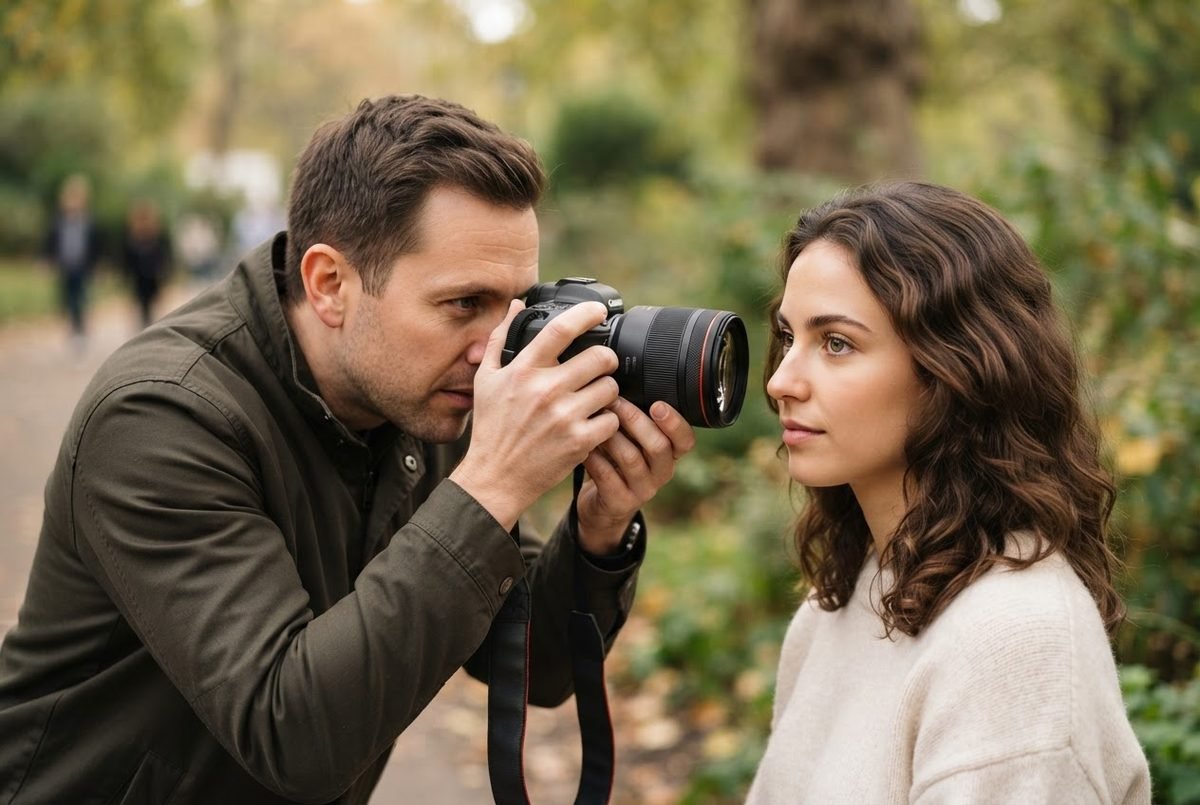
A professional photographer capturing a portrait of a young adult wearing smart casual attire, standing confidently against a blurred nature backdrop, emphasizing sharp detail in the eyes. The subject's face is illuminated with soft, diffused natural light, highlighting the texture of the skin and the clarity of the eyes. The camera is positioned at eye level, using a 85mm lens for flattering compression, creating a shallow depth of field to isolate the subject from the background. The atmosphere conveys a sense of calm professionalism, with subtle greens and blues in the bokeh enhancing the focus on the subject's expressive gaze. The image reflects technical precision in camera stability and technique. Stay focused, Ray Baker.

Good handholding technique helps you get sharp eyes in portraits faster. Hold your elbows against your ribcage and tuck the lens into your chest. Control your breath and press the shutter softly and steadily.

Use the reciprocal rule as a guide: set shutter speed at or above 1 divided by focal length. For portraits with telephoto lenses, add a safety margin. Aim for 1/125s to 1/250s to reduce camera shake and avoid soft results.

Tripods and monopods are great for static setups or slow shutter speeds. Use a 2-second timer or remote release to avoid vibration. Image stabilization in-lens or in-body helps in low light, but it won’t stop subject motion blur. So, pair IS with the right shutter speed and aperture.

Burst shooting increases your chances of getting sharp eyes in portraits. Use high-speed continuous drive with Eye AF to get multiple frames with precise focus. Often, one frame will have perfect focus while others are slightly off.

After a few test frames, zoom into the camera’s LCD to check focus. This is key for very shallow depth of field or when trying a new lens. If eyes look soft, adjust focus area, aperture, or add more shutter speed until you get the eye detail you want.

Quick checklist:

  • Brace elbows, tuck lens, control breath to reduce camera shake.
  • Use 1/focal length plus safety margin for handheld portraits.
  • Mount a tripod or use remote release for static, slow exposures.
  • Enable IS for low light; but watch for subject motion blur.
  • Shoot bursts with Eye AF to increase keeper rate.
  • Verify focus on the LCD after test shots when aiming for sharp eyes in portraits.

Dealing with challenging conditions: low light and movement

Shooters often face two common problems: dim light and subject motion. Use practical steps to protect sharpness and keep the viewer’s attention on the eyes.

Low-light focus strategies start with giving the autofocus system more signal. Raise ISO enough to allow a faster shutter. Use fast lenses such as 50mm f/1.8 or 85mm f/1.4 so the AF sensor sees more light.

Enable AF assist or add a small continuous light source like a headlamp when shooting in near-darkness. Mirrorless bodies from Sony or Canon often brighten the electronic viewfinder, which helps focus and composition.

Low-light focus strategies

When eyes lack contrast, pre-focus on a nearby contrast edge such as the hairline or nose rim. Lock focus, then recompose while keeping subject distance steady. If AF hunts, step up ISO temporarily to stabilize the system.

Prefer single-point AF or small zone AF for portraits in dim scenes. Reduce autofocus confusion by turning off face detection if background lights create false targets.

Capturing moving subjects while keeping eyes sharp

For movement choose continuous AF (AF-C) and map Eye AF to a dedicated button for fast access. Use high-speed continuous drive and anticipate where the subject will be. Pre-focus that spot when possible.

Raise shutter speed; start at 1/500s and increase for quick motion. If light allows, stop down slightly to f/2.8–f/4 for a wider plane of sharpness that helps retain sharp eyes in portraits during motion.

When to choose manual focus

Manual focus portraits work best for static subjects in low light, macro faces, tripod studio work, or astrophotography. Use focus peaking and magnified live view on cameras like the Canon EOS R or Sony a7 series to nail the plane of focus.

Switch to manual when autofocus cannot find contrast or keeps hunting. Take several frames and review focus at 100% on the camera display to confirm sharp eyes in portraits.

Keep experimenting with these portrait focus tips, mix auto and manual methods, and shoot extra frames to increase the chance of a keeper when conditions are tough.

Post-production sharpening and checking eye detail

Shoot RAW to keep the most image data and flexibility. Shooting RAW portraits preserves fine detail and dynamic range. This way, selective edits won’t destroy texture.

Before leaving a session, zoom to 1:1 on the camera. This lets you assess sharpness of the eyes. Make quick adjustments to focus or technique if needed.

Use targeted tools in Lightroom Classic or Capture One for post-production sharpening. Apply sharpening and local contrast only to the irises and lashes. Don’t sharpen the whole frame.

Over-sharpening creates halos and unnatural skin texture. So, keep sliders conservative and preview at 100%.

When ISO is high, balance noise reduction with sharpening. Heavy noise reduction can erase microdetail in the eyes. Create a mask that isolates the eyes, apply modest sharpening there, then add noise reduction to shadow areas away from the eyes.

Discard images when eyes sit well outside the focal plane or when motion blur removed detail. If focus missed by a small margin but the expression and composition are strong, try to rescue soft images first. Small softness often responds well to selective sharpening, local contrast boosts, and a tighter crop that emphasizes the face.

Adopt a rapid rating system on location to tag keepers and rejects. This practice lets you reassess files later with fresh eyes and precise post-production sharpening steps. Consistent naming and ratings make it easier to find shots that deserve a rescue attempt.

Practical shooting checklist and shareables

Quick answer (60–90 words): To get sharp eyes in portraits, focus on the eyes first. Use Eye AF or single spot AF on the closest eye. Pair AF-C with back-button focus.

Balance aperture, shutter, and ISO so the eye is in focus. Use good lenses like the Sony 85mm f/1.4 G Master. Keep steady or use a tripod. Shoot in RAW and check your shots 100% on-camera.

Three key takeaways: 1) Focus on the eye and use Eye AF or back-button AF. 2) Don’t use very wide apertures unless you can rely on Eye AF. 3) Use the right shutter speed and stabilization. Refine eyes in post-processing if needed.

Shareable checklist: Map Eye AF to a button, set AF-C with back-button focus, place spot AF on the nearest eye. Start at f/2.8–f/5.6, use 1/125s+ (or follow the reciprocal rule). Prefer burst + Eye AF for motion, inspect 100% on-camera, and shoot RAW.

Practical on-set gear checklist should include a camera with reliable Eye AF (Sony α7R III, Sony α9, Canon EOS R series, Nikon Z series). Also, a quality prime or pro zoom, spare batteries, headlamp or AF assist, and tripod. For sample shot lists and setup ideas, see this portable guide on event portrait setups at event photography shot list.

Practical checklist for shoots: feature image brief (natural adults 25+, U.S./AU feel, candid), in-session steps to map Eye AF, choose spot AF, set AF-C, pick aperture and safe shutter speed, then set ISO. Post-session: review 100% for eye sharpness, mark keepers and rejects, and apply selective sharpening.

Short SMS-style shareable: “Hey — quick tip: put the focus point on the nearest eye, use back-button AF and Eye AF if your camera has it, and shoot RAW. Saves tons of soft-eye heartbreaks. — Ray” Advice focuses on evergreen techniques; firmware and lens behavior vary, so test gear before critical shoots. Stay focused, Ray Baker.

FAQ

What’s the quickest way to stop getting soft eyes in portraits?

Use Eye AF or place a single spot AF on the nearest eye. Switch to AF-C and map focus to a back-button AF. Balance aperture, shutter speed, and ISO so the eye sits inside the depth of field.Shoot RAW and review 100% on the camera to confirm sharpness.

Why are sharp eyes so important in portrait photography?

Humans seek eye contact to read emotion. Sharp eyes act as the emotional anchor in an image. When eyes are tack-sharp, the viewer connects with the subject.Soft eyes, even in a well-composed picture, reduce perceived professionalism. They can lead to rejections.

How does Eye AF work and why is it a game-changer?

Eye AF algorithms detect facial features and isolate eye regions. They maintain a lock as the subject moves or breaks direct gaze. It removes much of the guesswork with very shallow depth of field lenses.Turning focus from hit-or-miss into a predictable result. Photographers can concentrate on expression and composition.

Which camera models are best for reliable Eye AF and eye-tracking?

Look for second- and third-generation mirrorless bodies with robust subject detection. Notable examples include Sony α7R III and Sony α9; Canon EOS R-series and Nikon Z-series also offer strong Eye AF.Key features to watch: plentiful AF coverage, AF-C performance, customizable AF areas, and firmware updates.

What settings optimize Eye AF performance?

Enable Face + Eye Detection in the menu, use AF-C for moving subjects. Set AF area to a flexible single-point or small zone if needed.Map Eye AF to a dedicated button and provide good light/contrast on the subject’s face. Keep firmware current for best results.

Should I use spot AF, single-point AF, or let the camera choose?

For portraits, prefer spot AF or single-point AF placed on the eye for maximum precision. Spot AF is best with very shallow depth of field or long focal lengths.Letting the camera choose is acceptable only when your camera’s detection is proven reliable or the scene is unpredictable.

What aperture should I use to guarantee sharp eyes?

Very wide apertures (f/1.2–f/1.4) offer beautiful bokeh but increase focus risk. Start around f/2.8–f/5.6 for reliable eye sharpness.Remember most lenses are sharpest 1–3 stops down from wide open—commonly around f/4–f/8 for many lenses.

What shutter speed keeps eyes from blurring?

Use the reciprocal rule (1/focal length) as a baseline, and add a safety margin. For portraits aim for 1/125s–1/250s handheld.For moving subjects, start at 1/500s or faster depending on action. Faster shutter speeds protect against subject motion blur even when stabilization is active.

How should I manage ISO so eyes stay sharp and clean?

Prioritize shutter speed and aperture to keep eyes in the depth of field, then raise ISO as needed to maintain those settings. Start at ISO 100 and increase to preserve a safe shutter speed.Modern mirrorless bodies tolerate higher ISO, but avoid aggressive noise reduction that softens eye detail.

Do primes or zooms give the sharpest eyes?

High-quality primes often have an edge in sharpness and offer faster maximum apertures (e.g., 50mm or 85mm f/1.4) for subject separation. Professional zooms (70-200mm f/2.8, 24-70mm f/2.8) can be equally sharp, Choose based on style: primes for extreme bokeh and peak sharpness, zooms for flexibility.

How do I find a lens’s sweet spot for portraits?

Test your lens across its aperture range and focal lengths. Most lenses perform best 1–3 stops down from wide open. Note the aperture and focal length where microcontrast and edge-to-edge sharpness peak—often around f/4–f/8 on many modern lenses.

Which lenses are recommended for consistently sharp eyes?

Real-world options include the Sony 85mm f/1.4 G Master and 50mm f/1.4 for Sony users; Canon and Nikon users often turn to 85mm f/1.4 or f/1.8 and 50mm f/1.4 or f/1.8 primes. High-end zooms like 70-200mm f/2.8 and 24-70mm f/2.8 are reliable choices too. Affordable 50mm f/1.8 lenses can be excellent starter portrait glass.

How should I hold the camera to protect eye sharpness when handheld?

Brace your elbows into your body, tuck the lens to your chest, control your breathing, and press the shutter smoothly. These simple ergonomics reduce camera shake and increase the chance of nailing critical eye detail.

When is a tripod or other support necessary?

Use a tripod for static studio setups, tethered work, or when slow shutter speeds are required. Employ a 2-second timer or remote release to eliminate vibration. For handheld shooting in low light, use stabilization but maintain a safe shutter speed to avoid subject motion blur.

How do I keep eyes sharp in low light?

Open the aperture, increase ISO as needed to maintain shutter speed, and use AF assist or a headlamp to add contrast for the AF system. Mirrorless cameras often aid AF in low light with brighter EVF previews and sensitive AF algorithms. If AF hunts, raise ISO temporarily to give the system more signal.

How do I capture moving subjects and yet keep eyes sharp?

Use AF-C + Eye AF, increase shutter speed (start at 1/500s), shoot in high-speed burst mode, and pre-focus on the anticipated plane. If possible, stop down slightly to expand depth of field and give the AF system more margin for error.

When should I switch to manual focus for portraits?

Use manual focus for static, low-light, macro, or near-dark scenes where AF cannot lock. On a tripod, use focus magnification and focus peaking for precise placement. For most live portrait sessions, modern Eye AF in AF-C will be faster and more reliable.

What’s the best way to check eye sharpness on location?

Zoom to 100% (1:1) on the camera’s LCD after a few test frames and inspect the eyes. Take burst sequences and review the sharpest frames. Adopt a rating system in-camera to separate keepers from rejects while on the shoot.

How should I sharpen eyes in post without overdoing it?

Shoot RAW, then use selective sharpening masks in Lightroom Classic or Capture One to apply crispness only to the eyes. Keep global sharpening conservative and add clarity or microcontrast locally. Avoid heavy noise reduction on eyes—apply NR selectively to shadow areas instead.

Can I rescue a portrait with slightly soft eyes?

Minor softness can often be improved with selective sharpening, local contrast, and masking. If the eyes are clearly out of focus or motion-blurred, rescue is unlikely; consider creative crops or black-and-white conversion for images with strong expression but imperfect focus.

What practical on-shoot checklist ensures sharp eyes every time?

Map Eye AF to a button, set AF-C and spot AF, place the focus point on the nearest eye, choose a safe aperture (f/2.8–f/5.6), set a safe shutter speed (1/125s+ or per focal length), set ISO to preserve shutter/aperture, use burst mode when needed, and inspect 100% on-camera.

Are there any firmware or calibration considerations I should know?

Keep camera and lens firmware updated for improved Eye AF and tracking. If a lens consistently misses focus, consider service for calibration or use microadjustment features where available. Avoid cheap filters that degrade sharpness and replace worn front elements or caps.

What are simple habits that improve eye-focus hit rate long-term?

Regularly test and learn your gear’s sweet spots, map frequently used functions (Eye AF/back-button AF) for speed, habitually inspect images at 100% during shoots, and practice handholding technique. Use high-quality glass when possible and adopt burst-plus-Eye AF for moving subjects.

Are there quick shareable tips I can keep on my phone?

Yes. Map Eye AF to a button; use AF-C + back-button focus; spot AF on the nearest eye; start at f/2.8–f/5.6; use 1/125s+ (or 1/focal length rule) and increase ISO before dropping shutter/aperture; burst mode + Eye AF for movement; inspect 100% on-camera; shoot RAW.

Struggling to get consistent photography clients?

Get More Photography Clients