
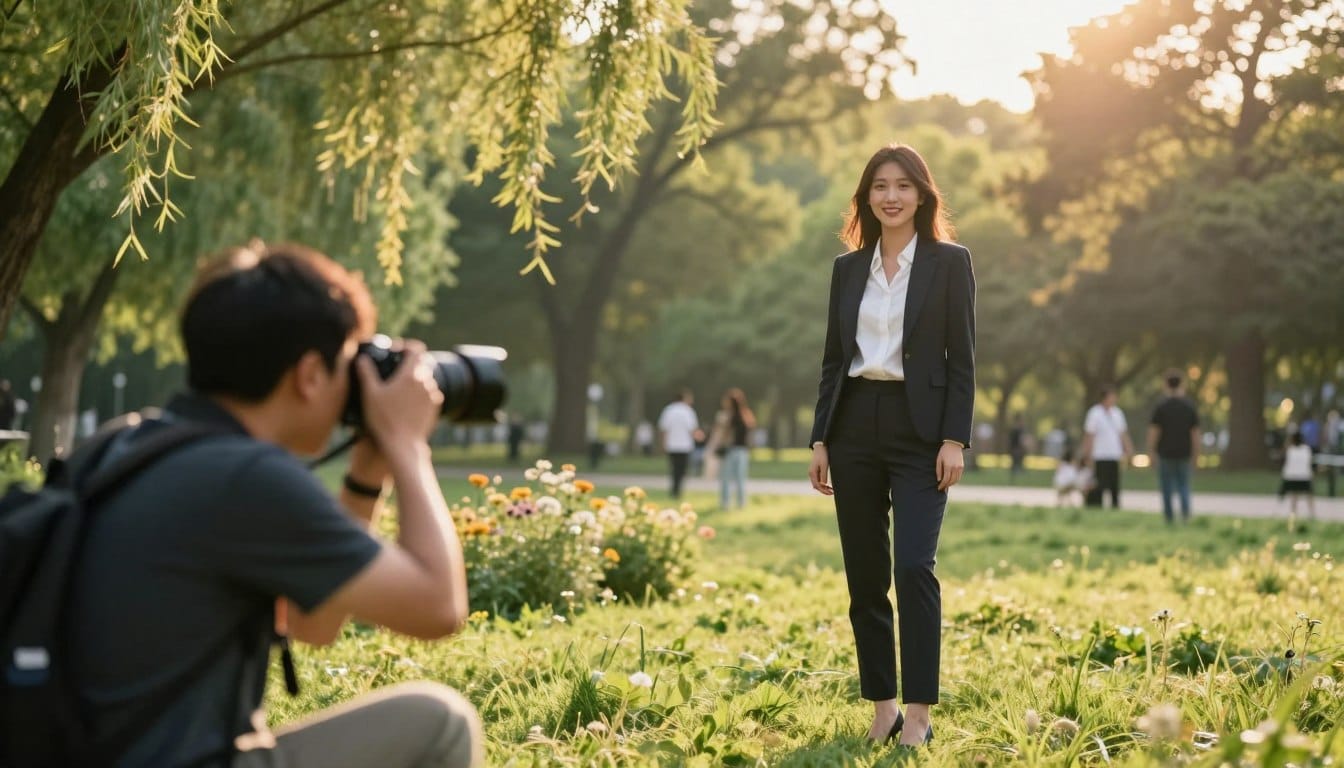
Have you ever wondered why some images resonate deeply while others fall flat? Capturing stunning outdoor portraits is an essential skill for both professionals and casual enthusiasts alike. Many aspiring photographers find themselves overwhelmed by the balance of subject interaction, camera settings, and lighting. This can often lead to frustration.
Mastering the art of capturing vibrant images is the first step toward transforming your casual snapshots into captivating works of art. While the unpredictability of natural light and posing can be daunting, these challenges can be easily overcome with the right techniques. Whether you are in a bustling city or a serene park, knowing how to manipulate your environment is crucial.
If you’re ready to elevate your craft, this guide will provide you with the essential tools to create beautiful images that resonate with your audience. By focusing on the interplay between your camera settings and the natural world, you can turn every session into a rewarding creative endeavor.
Key Takeaways
- Understanding lighting is key to capturing stunning images.
- Engaging with your subject enhances the overall composition.
- Mastering camera settings is essential for quality results.
- Natural environments can be creatively manipulated for better shots.
- Practice is crucial to developing your unique style.
Understanding the Challenges of Outdoor Portraiture
Every outdoor photography session presents unique challenges that can test a photographer’s skills. When capturing portraits in nature, you must contend with unpredictable elements. This can lead to difficulties in managing your subject and the surrounding environment.
One of the primary challenges is dealing with changing light conditions. Experts at GotPhoto emphasize the importance of adaptability in these situations. Harsh midday light can create squinting subjects and unflattering shadows, significantly affecting the quality of your images.
To successfully capture stunning outdoor portraits, you must move beyond simple point-and-shoot methods. Actively managing the environment around your subject is essential. By recognizing these challenges early, you can implement strategies that turn potential pitfalls into opportunities for creative growth.
| Challenge | Impact on Portraits | Possible Solutions |
|---|---|---|
| Harsh Lighting | Causes squinting and shadows | Use reflectors or find shaded areas |
| Changing Weather | Affects mood and visibility | Plan for backup locations |
| Distracting Backgrounds | Draws attention away from subject | Choose simple or blurred backgrounds |
Quick Fixes for Common Pain Points
Capturing breathtaking images often requires quick solutions to common challenges. When dealing with harsh light, a simple yet effective fix is to move your subject into the shade. This instantly softens the light and eliminates distracting shadows.
If shade isn’t available, consider using a five-in-one reflector kit. This tool can bounce light back onto your subject, filling in dark areas and enhancing the overall look of your portraits.
Another frequent issue is the intensity of direct sunlight. Using a diffusion panel can transform harsh light into a soft, flattering glow, improving your subject’s appearance significantly.
If your subject appears stiff, incorporate simple props or encourage movement. This can help create more natural and authentic moments in your portraits.
Remember, even the most experienced professionals encounter these challenges. Having a few quick fixes in your toolkit can save your entire shoot.
Essential Equipment and Camera Settings for Stunning Outdoor Shots
The right equipment can significantly enhance your ability to capture stunning images. A solid setup begins with choosing the right camera and lens. For portrait photography, a 50mm or 85mm prime lens is highly recommended. These lenses help avoid perspective distortion, ensuring your subjects look their best.
When it comes to settings, a shutter speed of at least 1/250s is ideal. This speed freezes minor movements, like hair sway or clothing flutter, resulting in crisp images. Additionally, utilizing Aperture Priority mode allows you to control your depth of field while the camera manages exposure. This is especially useful in changing outdoor conditions.
If you aim for that professional look, shoot at a wide aperture like f/1.8 or f/2.8. This creates a beautiful, shallow depth of field, making your subjects stand out. Lastly, keep your ISO at 100 whenever possible to ensure your images are free from noise and retain the highest detail.

Mastering the Use of Natural Light Outdoors
Natural light can dramatically influence the quality of your images, especially when you know how to use it effectively. One of the best times to shoot is during the golden hour, which occurs just after sunrise or before sunset. This time provides a soft, warm glow that is ideal for capturing flattering portraits.
On an overcast day, the clouds act as a massive natural diffuser. This creates an even, soft light that is perfect for capturing beautiful skin tones. Additionally, understanding how the sun moves throughout the day allows you to plan your sessions to take advantage of the most flattering light available.
Leveraging the Golden Hour and Soft Light
- Mastering natural light is the secret to professional-looking portraits.
- Use a gray card to set your white balance for consistent color across your images.
- During the blue hour, don’t hesitate to increase your ISO to maintain sharp shots.
Strategies for Overcast Conditions
- Cloudy skies provide a beautiful, diffused light, perfect for enhancing your subjects.
- Always check your white balance settings to ensure color accuracy.
Outdoor Portrait Photography Tips: Creating Natural Poses and Authentic Moments
Establishing a genuine connection with your subject is crucial for capturing natural expressions in your photos. When subjects feel at ease, they produce more authentic and candid images. This connection can transform a standard session into a memorable experience.
Simple and relaxed poses often yield better results than stiff, staged positions. Encouraging your subject to interact with their surroundings can lead to genuine moments that tell a story. Instead of over-posing, allow them to move freely.
If your subject seems uncomfortable, try giving them a simple task, like walking slowly. This helps them forget about the camera and can result in more relaxed poses. Remember, your role is to guide, not to dictate every movement.
By fostering a friendly atmosphere, you ensure that the final photos reflect the true personality of the person you are capturing. These elements are essential for creating impactful images that resonate with viewers.
| Tip | Description | Outcome |
|---|---|---|
| Build Rapport | Engage with your subject to create comfort. | More authentic expressions. |
| Encourage Interaction | Have subjects interact with their environment. | Genuine moments captured. |
| Guide, Don’t Dictate | Provide gentle direction rather than strict poses. | Natural movement and poses. |
Creative Composition and Location Scouting for Impactful Portraits
Finding the right location is essential for capturing stunning images. It’s not just about choosing a beautiful spot; it’s about understanding how light and background interact with your subject. A well-chosen location can elevate your images significantly.
Utilizing the rule of thirds is a powerful technique in composition. By placing your subject off-center, you create a more dynamic and balanced portrait. This method enhances visual interest and engages the viewer more effectively.
Don’t hesitate to incorporate natural elements into your shots. Tree branches or archways can frame your subject beautifully, adding depth and context to your images. If you want to capture more of the surrounding environment, consider using a wider lens, such as the 24L Canon. This lens allows you to tell a broader story within your frame.
Always look for leading lines in your environment. Paths or fences can guide the viewer’s eye directly to your subject, making your portraits more impactful. By scouting locations with these elements in mind, you enhance your ability to create stunning images.

For more insights on scouting locations, check out this guide on location scouting.
Enhancing Your Images with Post-Processing Insights
Post-processing is where your captured moments transform into stunning visuals. Understanding how to edit your images can significantly enhance their quality. Shooting in RAW format is essential. It acts as a digital negative, allowing for significant recovery of highlights and shadows in post-processing.
RAW files provide the flexibility to adjust exposure by a stop or more without losing critical detail in your final images. This flexibility is vital for achieving the best results in your portrait photography.
- Always shoot in RAW format to ensure you have the maximum amount of data, which is crucial for making high-quality adjustments.
- Unlike JPEG files, RAW data allows you to recover clipped highlights and shadows, giving you much more control over the final exposure.
- When you open your files in software like Adobe Camera Raw, you will appreciate the ability to perform precise color grading that JPEGs simply cannot handle.
- Even if you are a beginner, learning to process your RAW files will significantly improve the professional look and feel of your images.
- Remember that post-processing is not about fixing mistakes, but about unlocking the full potential of the images you captured during your session.
Integrating Storytelling and Warm Aussie Humor Into Your Photography
Every click of the shutter can tell a story, and infusing a bit of humor can make your images even more relatable. If I can manage to trip over my own tripod while trying to capture the perfect golden hour shot, then you certainly have nothing to worry about! Adding a touch of self-deprecating charm can lighten the mood and create a comfortable atmosphere for your subjects.
Integrating storytelling into your work is like adding a bit of Vegemite to toast; it might seem strange at first, but it adds a necessary depth. Sharing your journey and your mistakes not only connects you with others but also invites them to share their experiences. Don’t take yourself too seriously; even the best photographers have days where the weather, the light, and the camera settings all seem to conspire against them.
To streamline your workflow, consider tools like GotPhoto. They help manage your business efficiently, allowing you to focus on the fun part-actually taking photos! And for those eager to improve their skills, the NYIP offers structured courses that can elevate your craft.
Want to Start Your Own Photography Business? Embrace the journey, laugh at the mishaps, and let your personality shine through in your images.
Wrapping Up Your Outdoor Portrait Journey
Reflecting on your experiences in capturing striking images can pave the way for future success. Always prioritize the eyes when focusing to ensure your portraits are tack-sharp and emotionally engaging for the viewer. Master your camera settings, especially aperture and shutter speed, to maintain control over your images regardless of the conditions.
Preparation is key. From scouting your location to using a gray card for perfect white balance, these steps are crucial for achieving stunning results. As you continue your journey, remember these key takeaways:
- Key Takeaway 1: Always prioritize the eyes for sharp, engaging portraits.
- Key Takeaway 2: Master camera settings like aperture and shutter speed.
- Key Takeaway 3: Preparation, including location scouting, is essential.
Here are some common questions:
- How do I handle harsh sun? Use shade or a diffuser.
- What lens is best? A 50mm or 85mm prime.
- Should I shoot RAW? Yes, always.
- How do I pose subjects? Keep it natural and encourage movement.
Disclaimer: Photography involves equipment that can be damaged by weather; always exercise caution and protect your gear in extreme conditions. By consistently applying these techniques, you will find that your photography improves significantly with every session. Keep practicing, stay curious, and remember that every great photographer started exactly where you are today, learning one tip at a time.