
Are you tired of your camera making all the decisions? Want to control how your photos look? Switch to manual mode and take charge of sharpness, motion, and noise in just a few steps.
This section will give you a practical start. You’ll learn about the photography exposure triangle and how to use aperture, shutter speed, and ISO. You’ll also do quick exercises to learn faster than memorizing numbers.
Learning happens by doing. Try bracketing shots, go on a fixed-aperture walk, and check histograms and highlight warnings. This will show you what changes.
Manual mode is a creative tool, not a mystery. Use your camera’s meter as a guide. Or, use a handheld light meter if you like. Always choose settings that match your vision: use a wide aperture to isolate subjects, a fast shutter to freeze motion, and a low ISO to reduce noise.
Practice and review your work often. Share your photos on Instagram and discuss them in forums or resources like Digital Camera World. This will help you get better fast.
Quick answer (60-90 words): Start by setting aperture, shutter speed, and ISO on purpose. Use the camera’s meter as a guide. Then, bracket exposures and do a fixed-aperture walk to see how depth-of-field changes. Check histograms and highlight warnings after each shot. Repeat short drills to build muscle memory and reduce auto mode use. That’s how you learn manual photography without feeling overwhelmed.
Key Takeaways
- Manual mode removes guesswork and gives creative control over exposure and look.
- Understanding the photography exposure triangle (aperture, shutter, ISO) is the foundation.
- Short, repeatable exercises like bracketing and fixed-aperture walks speed learning.
- Using the camera’s meter and checking histograms helps make better camera settings beginner-friendly.
- Good exposure choices upstream cut down editing time later.
Why photographers stop guessing and switch to manual mode
Many photographers get tired of automatic settings. They often get pictures that don’t look like what they see. Problems like blown highlights, dark faces, or wrong shutter speeds happen a lot.
These issues make it hard to get consistent pictures. It breaks the photographer’s flow and makes it hard to get the look they want.
Pain points with automatic modes
Full Auto, Program, and scene presets can change exposure between frames. The camera might choose a fast shutter or a deep depth of field. This can lead to pictures that don’t match what you want.
For beginners, trying different camera settings can be overwhelming. Auto exposure can mess up pictures in bright or dark scenes. This means you lose detail and spend more time fixing pictures later.
Benefits of deliberate exposure decisions
Switching to manual lets you control exposure for each picture. You get consistent pictures with the right depth of field and motion. It’s easier to control and less surprising.
Using manual also makes your work faster. Once you set the camera settings, you can focus on capturing moments. Professional sites like Digital Camera World say trying manual can make your work better. Read more at this practical discussion.
Real-world example from street and portrait shooting
On the street, backlit subjects are a common problem. Auto exposure makes the background too bright, leaving faces dark. In manual, you can set exposure for the subject, keeping skin tones right.
In portraits, autofocus and auto-exposure can mess up highlights on lighter skin. Manual lets you control highlights or shadows. This way, you get consistent pictures and save time fixing them later.
Learning camera settings through practice shows why many photographers choose manual. It helps you get pictures that match what you see. It makes the process clearer and more enjoyable.
manual mode for beginners
Learning to control exposure changes how you see photos. This guide helps you learn manual photography. It names the three core controls and shows when manual gives cleaner results than automatic modes.
What manual mode actually controls
Manual mode lets you set aperture, shutter speed, and ISO. Aperture (f-stop) changes depth of field and light. Shutter speed makes motion freeze or blur. ISO affects image noise.
In manual, the camera only records your settings. It shows metering information but won’t change exposure for you. This gives consistent results when you learn manual photography.
How it differs from aperture-priority and shutter-priority
Aperture-priority locks the aperture and the camera picks shutter speed. Shutter-priority locks the shutter speed and the camera picks aperture. Manual lets you set both aperture and shutter, plus ISO, for full control.
Choose aperture-priority for constant depth of field. Use manual when light changes rapidly or backlight tricks the meter. For shutter-priority, pick shutter-priority to freeze action quickly. Switch to manual for mixed lighting or a specific look.
Everyday scenarios where manual shines
Backlit portraits and sunrise scenes often fool automatic exposure. Manual lets you protect highlights and keep skin tones natural.
Long exposures for waterfalls, star trails, or light painting need exact shutter speeds. Mixed lighting indoors, like tungsten and window daylight, benefits from manual because meters average and give uneven results.
Night street photography and creative motion blur are easier with manual mode. Start with scenes where the camera consistently gets it wrong. This gives quick feedback and helps you learn manual photography faster.
| Situation | Camera auto choice | Why manual helps |
|---|---|---|
| Backlit portrait | Underexpose subject to save sky | Set exposure to protect skin tones and use fill flash or reflector |
| Waterfall long exposure | Camera may pick fast shutter to avoid blur | Choose slow shutter for smooth water while controlling aperture and ISO |
| Night street scene | High ISO and noisy image | Set lower ISO, open aperture, and adjust shutter for cleaner image |
| Mixed indoor lighting | Meter averages conflicting light | Set exposure manually and adjust white balance for consistent color |
| Action sports | Meter may vary with bright backgrounds | Lock shutter speed to freeze motion and set aperture for depth of field |
Understanding the photography exposure triangle
The photography exposure triangle is key. It connects aperture, shutter speed, and ISO. Learning this triangle helps you control light, motion, and image quality. Digital Camera World says to trust manual mode and practice these links to improve your skills.
Aperture: depth of field and light control
Aperture controls light and sharpness. Wide apertures like f/1.4-f/2.8 are great for portraits and low light. They create a shallow focus.
Smaller apertures like f/8-f/16 are better for landscapes and group shots. They increase the depth of field. But, very small openings can soften details.
Shutter speed: freezing vs. showing motion
Shutter speed affects how light is captured and motion is shown. Fast speeds like 1/1000s freeze action. For handheld portraits, use 1/125s to 1/250s to avoid shake.
Speeds around 1/30s start to show motion blur. Use a tripod or stabilization for these speeds. Long exposures create light trails and smooth water.
ISO: sensitivity trade-offs and noise
ISO changes how sensitive the sensor is. Use base ISO (100-200) for the cleanest images. Raising ISO brings noise but brightens the image.
Modern cameras handle high ISO well. But, there are always trade-offs. Practice to know when to accept grain and when to seek more light.
Look at Instagram to see how others handle exposure. Learning from others can speed up your understanding of aperture, shutter speed, and ISO.
Camera settings beginner checklist before your first manual shoot
Before you start using manual mode, do a quick check. This helps you save time and focus on your shot. Use it every time you’re ready to shoot.
Image quality, color space, and file naming
Always shoot in RAW to keep more detail. If you’re posting online, use sRGB. For editing or printing, try Adobe RGB. Choose RAW or RAW+JPEG based on your needs.
Make your file names clear and organize your folders. This makes finding your photos easy.
Metering mode, autofocus mode, and white balance essentials
Begin with evaluative or matrix metering for most scenes. Use spot metering for small areas, like faces in bright light. These tips help you adjust your settings in manual mode.
For static subjects, use AF-S (One-Shot on Canon). For moving subjects, choose AF-C (AI Servo on Canon). Use single-point AF for portraits and zone or dynamic area for action.
Set white balance to Auto for complex lighting. Lock or choose a preset when color is key.
Lens and stabilization checks
Clean the lens front and back, check the mount, and lens contacts. Turn on image stabilization for handheld shots. Turn it off on a tripod to avoid movement.
Make sure the tripod is tight and test its tilt and pan. This checklist helps you feel ready for manual mode. A few minutes of prep makes learning easier and more fun.
Quick tests to build confidence on the first outing
Start with three short drills that take ten minutes each. These tests help you feel the camera instead of guessing. Each drill teaches a single idea for your next walk or shoot.
Sunny 16 and other simple exposure rules to try
The Sunny 16 rule is great for bright days. Set aperture to f/16 and choose a shutter speed near the ISO’s reciprocal. For ISO 100, try 1/100s.
Use this as a quick check against your meter. It helps you see how aperture and shutter work together.
Try this rule on cloudy or shadowed scenes too. Move from f/16 to f/8 and double the shutter speed. This shows how aperture and shutter change together.
Bracketing exercise to see exposure impact
Shoot three or five frames of the same scene with different exposures. Bracketing shows how highlights and shadows change.
Compare the images on your camera or later on a laptop. Note where detail is lost and which exposure fits the mood you want. This trains your eye to choose the best exposure.
Fixed-aperture walk to understand depth of field
Choose one aperture like f/2.8 or f/8 and keep it fixed while walking. Change distance and focal length to see how background separation changes. A fixed-aperture walk makes depth of field predictable.
Review shots on your camera and mark the distances you like. Repeat with a different aperture to compare. This speeds up learning and builds confidence in manual choices.
| Drill | What to set | Duration | What to learn |
|---|---|---|---|
| Sunny 16 rule | Aperture f/16, shutter ≈ 1/ISO | 10 minutes | Baseline exposure, quick meter check |
| Bracketing exercise | Same framing, vary exposure ±1 or ±2 stops | 10-15 minutes | Highlight/shadow behavior, preferred exposure |
| Fixed-aperture walk | Lock aperture (e.g., f/2.8 or f/8) | 15 minutes | Depth of field vs. distance and focal length |
| Quick review | Inspect on-camera and mark favorites | 5-10 minutes | Immediate feedback loop for improvement |
Practical step-by-step: setting exposure for a portrait
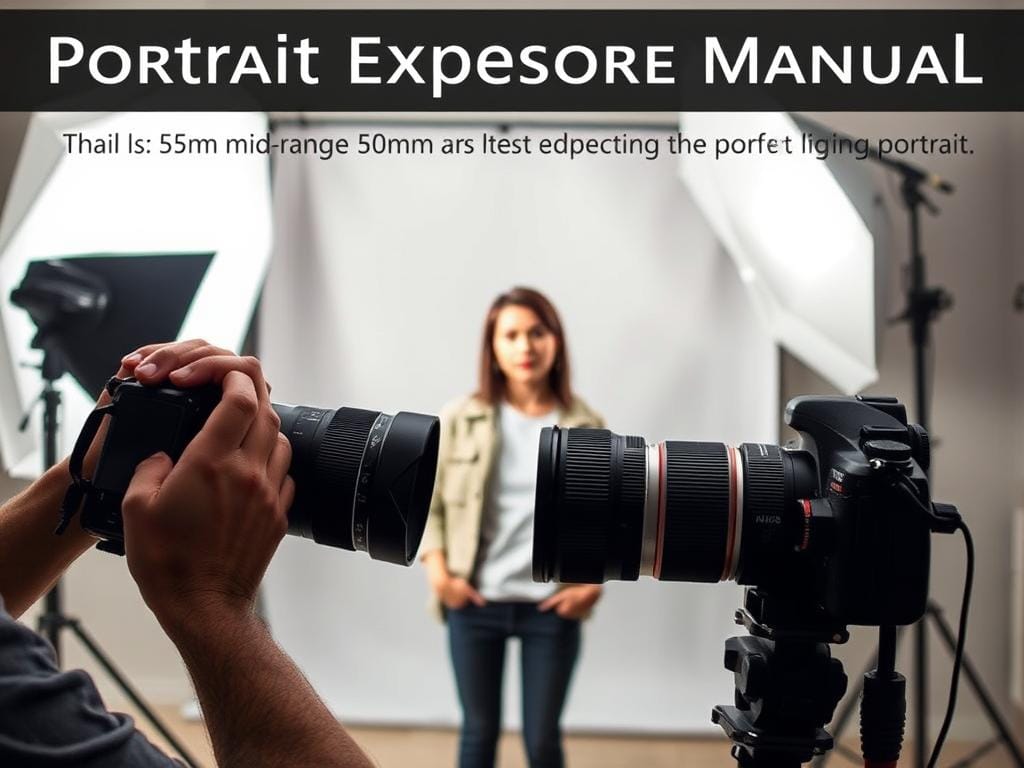
To get a great portrait, follow three steps. First, pick your lens and aperture. Then, set your shutter speed to keep your subject sharp. Lastly, adjust your ISO to keep highlights bright.
Choosing aperture for subject separation
Start by choosing your lens. Use lenses like 50mm and 85mm for nice bokeh. Pick wide apertures like f/1.8 to f/4 for more blur.
For headshots, use f/1.8-f/2.8. Focus on the eyes. For group shots, use f/3.5-f/4. This helps you choose the right aperture quickly.
Balancing shutter speed to avoid blur
Use a shutter speed rule: 1/(focal length) for sharp handheld shots. For example, 1/100s for a 100mm lens is good.
If your subject moves, increase shutter speed to 1/200-1/400s. For lively subjects, use at least 1/125s for sharp eyes.
Adjusting ISO for clean highlights and shadow detail
Choose the lowest ISO to avoid noise. Expose for highlights to keep skin tones right. Then, adjust shadows in-camera.
If it’s too dark, increase ISO in small steps. Use ISO tips: increase until the image looks good on the histogram. Modern cameras handle ISO well, helping beginners.
Practice: set aperture, then shutter speed, and adjust ISO. Digital Camera World says practice is key. Instagram has many examples to learn from.
Practical step-by-step: setting exposure for motion and low light
Learning to capture moving scenes and dim places starts with making choices. Use a simple method to pick shutter, aperture, and ISO. This helps you freeze action, show motion, and mix light.
Freezing action vs. intentional motion blur
To freeze fast subjects, choose a shutter speed between 1/500s and 1/2000s. For sports and wildlife, use continuous AF and high ISO. Sony, Canon, and Nikon handle high ISO differently.
To create motion blur, slow the shutter to 1/30s or seconds. Use a tripod for long exposures. Try panning at 1/60s for cyclists. This makes the rider sharp and the background streaky.
Using available light and artificial light together
First, set manual exposure for the scene. Meter the background to keep its mood. Add flash or an LED to light the subject.
Match color temperature in-camera or in post to keep skin tones natural. A motion exposure manual workflow makes balancing light predictable.
Tips for handheld low-light shooting
In low light, open the aperture wide and raise ISO. Use stabilization to gain several stops. If possible, brace against a wall or use a monopod.
Use short bursts, wide apertures, and careful breathing to improve sharpness. If shutter speed is low, choose higher ISO and stabilization over underexposed files.
Practice these steps on short outings. Test shutter speed values, try panning, and compare light balances. These exercises build confidence in low light manual mode.
Common mistakes beginners make and how to fix them
Beginners often make the same mistakes. These mistakes slow them down. Here’s a quick guide to avoid them.
Over-relying on auto-ISO without limits
Not setting limits on Auto-ISO is a big mistake. Cameras like Canon EOS, Nikon Z, and Sony Alpha will keep raising ISO. This can make pictures noisy and lose detail.
Set a top ISO limit and a minimum ISO for each photo. Start with ISO 640 or 1600 for low-light shots. Then adjust based on your camera’s noise level. If it’s too dark, use a wider aperture or slower shutter instead of raising ISO too high.
Ignoring histogram and highlight warnings
Just looking at the LCD screen can be misleading. Use the histogram and highlight warnings to check exposure. The histogram shows the range of tones in your photo.
Look at the right side of the histogram for overexposed areas. Turn on highlight warnings to catch these before leaving. Bracket exposures or adjust the exposure compensation to protect bright areas.
Confusing sharpness with exposure
A sharp image on the camera’s preview might be dark and noisy after editing. This mix-up between sharpness and exposure can ruin photos in post-processing.
Check focus, shutter speed, and exposure separately. Make sure shutter speed is right for your lens and the scene. Choose an exposure that keeps shadow details so you won’t need to denoise later.
Practice these steps on short trips. Share your photos on Instagram or compare with Digital Camera World. You’ll see how small changes make a big difference.
Developing a practice routine that sticks
To feel confident with manual shooting, you need a solid plan. A simple routine will help you keep moving forward. Short, focused sessions are better than long, aimless ones.
Short daily drills to build muscle memory
Do 10-15 minutes of focused tasks each day. One day, change only the shutter speed. Keep aperture and ISO the same. Another day, play with aperture and see how depth of field changes.
Do the same scene for a few days to get it right. Daily drills should be quick and clear. For example, take a single-subject portrait at f/4, or a fast-moving car at 1/500s. Try low-light handheld at ISO limits too. Log your settings and thoughts after each drill.
Weekly themed shoots to expand skills
Choose a theme each week to try new things. Themes can be portraits, street, architecture, or motion. Set a goal like “use f/2.8 to isolate the subject” or “get motion blur at 1/15s.”
Weekly shoots help you adapt. Try different lenses and lighting. Look at your photos from week to week to see how you’ve improved.
Review process: what to look for in your images
Take time to review your photos after every shoot. Look at exposure, histogram, and highlight clipping. Check depth of field, motion, and noise in shadows too.
When reviewing, keep a log of your camera, lens, settings, and conditions. Note what worked and what didn’t. Regularly reviewing your photos helps you learn faster and avoid mistakes.
Editing mindset for manual shooters
Learning to shoot manually helps a lot in editing. Making the right exposure choice in camera saves time. RAW files give more room for adjustments, but clipped highlights rarely recover.
Learn to read the histogram and meter for key areas in your frame.
How proper exposure reduces editing time
Good exposure means less time fixing images in Lightroom or Capture One. It keeps details in both highlights and shadows. This means you need to do less editing.
Expose so skin and highlights are just below clipping. Use camera highlight warnings to avoid losing data. Bracketing a few frames helps confirm a safe exposure.
When to recover shadows vs reshoot
Use RAW to recover shadows if the file has detail and noise is okay. Modern sensors do well with shadow recovery, but too much makes noise worse. If shadows lack detail or highlights are blown, it’s better to reshoot.
Reshoot if highlight clipping ruins texture or ISO noise makes recovery hard. A quick histogram check helps decide: if highlights are too bright, lower exposure; if shadows are too dark, increase exposure or add fill.
Color correction and preserving skin tones
Keep white balance the same on set to reduce color correction later. Use the eyedropper on a neutral patch or gray card in RAW editors for a reliable baseline. Small global tweaks can change mood, but big moves can harm skin color.
To keep skin tones right, use subtle local adjustments and mask by luminance. If you must change saturation or split toning, watch hue and naturalness with RGB parade or false color view.
| Issue | Quick test | Best action |
|---|---|---|
| Blown highlights on face | Check highlight warning and RAW thumbnail | Reshoot with -1/3 to -1 stop exposure; use reflector if needed |
| Crushed shadows with noise | Open RAW and pull shadows 2 stops | If noise is high, reshoot with lower ISO or add light |
| Skin tones look off | Use white balance eyedropper on neutral area | Adjust WB in RAW, then use HSL for fine hue correction |
| Uneven color between frames | Compare camera WB and highlight tones | Set locked white balance on camera or use a gray card for consistency |
Resources, inspiration, and next steps
Want to Start Your Own Photography Business?
Start small and follow focused actions. Practice the Sunny 16 rule. Run a bracketing session to see how exposure changes the mood.
Schedule a fixed-aperture walk to learn depth of field. Keep a settings log after each shoot. These steps pair well with resources manual mode for beginners and camera settings beginner guides to speed learning.
Quick Manual Mode Tips: 1) Learn Sunny 16, 2) Bracket exposures, 3) Fix one aperture per walk, 4) Set Auto-ISO limits, 5) Check histogram
Tried manual mode yet? Start with Sunny 16, bracket a few shots, and compare-let’s shoot together this weekend.
Learn from community and tutorial hubs like Instagram and Digital Camera World. Find image examples, how-to posts, and feedback. For deeper study, search for learn manual photography resources across those platforms.
Consult camera settings beginner guides that match your gear.
Want to Start Your Own Photography Business?
Note: techniques are evergreen and results vary by gear; brands like Sony, Canon, Nikon perform differently at high ISO. Regular practice remains the best teacher.
References: Instagram, Digital Camera World
Stay focused,
Ray Baker.