
Have you ever wondered why your images often turn out blurry, despite your best efforts? This common frustration can leave anyone feeling defeated. Fortunately, there are effective ways to enhance your camera skills and achieve stunning results.
In this guide, we will delve into essential strategies that can transform your photography experience. With insights updated by experts Kunal Malhotra and Jaymes Dempsey in July 2024, you’ll discover how to stabilize your setup. This means no more worrying about motion blur!
Imagine capturing every moment with clarity and precision. These straightforward adjustments can elevate your images, making them look professional and sharp. Whether you’re a seasoned pro or just starting out, these techniques will help you focus on your creative vision.
Key Takeaways
- Blurry images are a common issue that can be resolved with proper equipment usage.
- Stabilizing your camera is crucial for capturing sharp images.
- Simple adjustments can significantly improve your photography skills.
- Expert advice ensures you have the latest techniques at your fingertips.
- Focus on creativity without the distraction of motion blur.
Identifying Common Tripod Challenges and Quick Fixes
Have you ever noticed how a slight shake can ruin a perfectly good shot? Understanding the common issues with camera stability can significantly enhance your results. Many photographers face challenges like vibrations or improper setups that lead to blurry images.
To ensure sharp photos, consider these key points:
- If you are wondering when to use tripod support, remember that the slower your shutter speed, the more likely you need that extra stability.
- Tim Shields notes that for a 70mm lens, you should aim for at least 1/200th of a second to keep your photos crisp and clear.
- When using a 400mm lens, you must maintain a shutter speed of 1/800th or faster to prevent the camera from recording motion blur.
Quick Answer for Getting Started
To get started, ensure your tripod is on solid ground and avoid extending the center column, which is the fastest way to introduce vibrations. Always use a remote or timer to trigger the shutter, as even the slightest touch can ruin your long-exposure images.
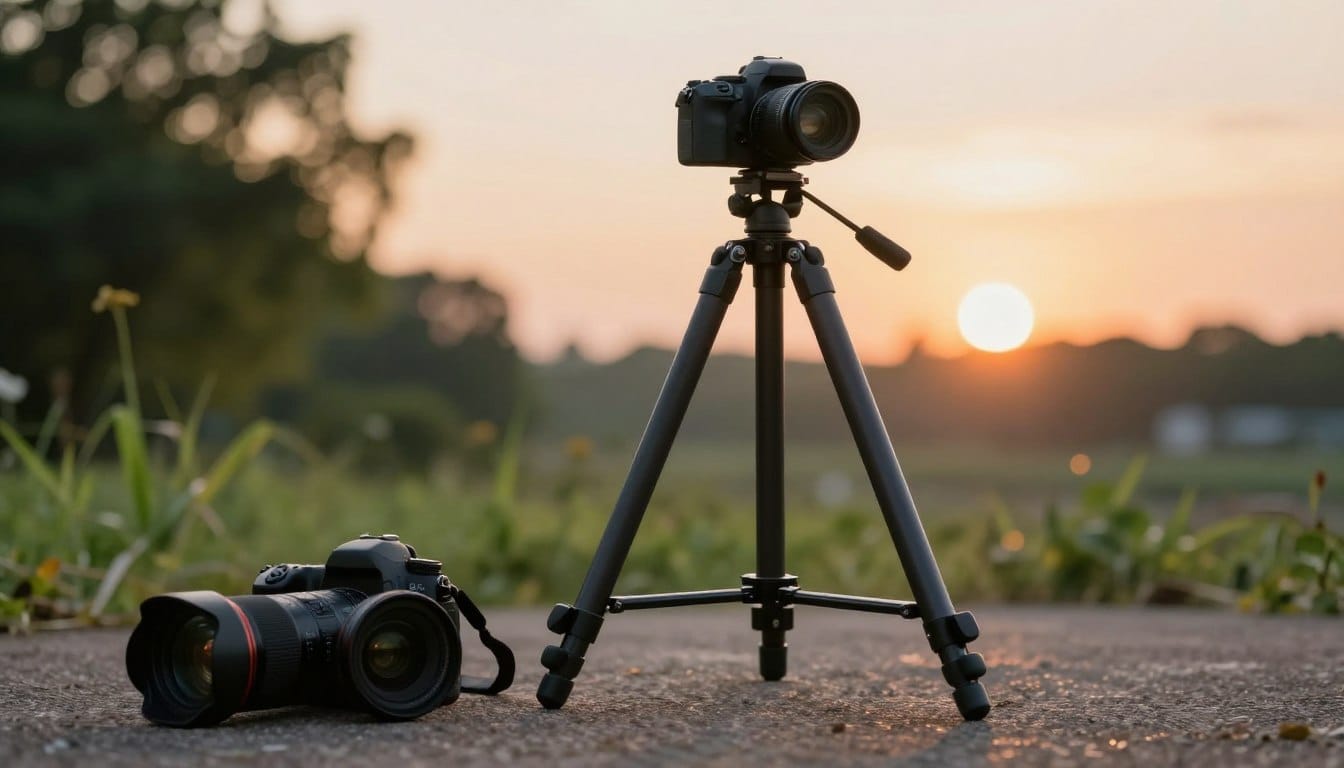
Essential Tripod Tips for Photography Setup
Achieving a steady shot is crucial for capturing sharp images. Selecting the right model can make a significant difference. When looking for a tripod, consider options like the Feisol CT-3342, which Tim Shields used in Arches National Park. This model offers exceptional stability.
Next, it’s important to extend your tripod legs correctly. Always start with the thickest sections first. This method helps maintain structural integrity and reduces the risk of wobbling. Remember, a sturdy head is just as vital as the legs, especially when supporting a heavy camera and lens.
To further enhance your setup, consider adding weight. This can increase stability, but make sure the bag rests on the ground to avoid pendulum effects. Lastly, a tripod with a fat pyramid shape provides a much more stable base, particularly on uneven terrain.
Techniques to Enhance Stability and Reduce Vibrations
Do you find that even small movements can lead to less-than-perfect images? To achieve sharp photos, it’s essential to minimize vibrations and ensure stability. Here are some effective techniques to enhance your setup.
Disabling Image Stabilization When Using a Tripod
When you mount your camera on a tripod, make sure to disable image stabilization. This is particularly important when your shutter speed drops below 1/80s. Leaving stabilization active can cause the system to search for movement that isn’t present, which can negatively impact your shots.
Utilizing Timers and Remote Shutter Releases
Using a 2-second timer is a simple way to allow vibrations from pressing the shutter button to dissipate. If you prefer not to wait, a remote shutter release is an excellent alternative. This method enables you to trigger your camera without touching the body, further reducing the risk of blurriness.
- Always check your lens settings to ensure the stabilization switch is off before starting.
- Even experienced photographers can see their images suffer if stabilization is left active.
- Utilizing these techniques can significantly improve your image clarity.
Optimizing Your Equipment: Settings and Accessories for Sharp Images
Have you thought about how specific settings can help you achieve sharper photos? Optimizing your equipment is essential for photographers aiming for clarity in their images. One key aspect is managing mirror lock-up. This feature minimizes internal vibrations caused by the mirror slap mechanism, especially during long exposures.
Another valuable accessory is the L-bracket. This tool keeps your camera centered over the tripod head, which enhances balance. When you switch to portrait mode, an L-bracket prevents the imbalance that can occur when you tilt the camera. Make sure your tripod head is robust enough to support your camera and lens combination effectively.
By using these techniques, you maximize the stability of your setup. This ensures that your landscape photography remains sharp from corner to corner. For more insights on achieving sharp images, check out this helpful guide.

Advanced Tripod Strategies: Mastering Long Exposures and Night Photography
Are you ready to take your photography to the next level with advanced techniques? Mastering long exposures and night shots can dramatically enhance your images. These strategies not only improve clarity but also open up new creative avenues.
For landscapes and cityscapes, using a sturdy setup is essential. A reliable tripod allows you to capture stunning long exposures without introducing motion blur. Remember: this is crucial when shooting star trails or capturing the beauty of flowing water.
When it comes to night photography, a solid tripod is indispensable. It ensures that your images align perfectly during HDR setups, preventing ghosting between exposures. A reliable base also simplifies shooting panoramas, allowing for smooth transitions as you move your camera.
Focus stacking is another advanced technique that requires stability. Even a tiny shift can ruin the final composite. With a dependable tripod, you’ll find these methods easier to master, enhancing your overall photography experience.
Weather, Terrain and Situational Adjustments for Tripod Use
Weather can dramatically affect your ability to capture clear images. When conditions are less than ideal, making adjustments is essential. For instance, Tim Shields utilized a Feisol CT-3772 in Alabama Hills, where gusty winds challenged his stability.
To enhance your setup in various terrains, consider these points:
- If you’re shooting on a hill, shorten the uphill leg while keeping the other two legs downhill to maximize stability.
- Pushing your tripod legs into the ground can prevent them from settling during long exposures.
- In strong winds, it’s often better to have no weight hanging from your tripod hook rather than a bag swinging in the breeze.
- Always keep your tripod lower to the ground in bad weather to reduce the surface area exposed to wind and vibrations.
These adjustments will help you maintain stability and clarity in your photos, no matter the conditions.

Final Thoughts on Achieving Sharper, Hassle-Free Photos
Capturing stunning images is a rewarding journey that demands practice and the right tools. Achieving tack-sharp photos requires patience and a commitment to using your equipment effectively. A high-quality tripod is an investment that will last for years, ensuring your setup remains stable.
By following the advice shared, you can avoid common pitfalls that lead to blurry images. Always double-check your settings before committing to a long exposure. This attention to detail will help you feel more confident the next time you head out with your camera gear.
Remember, photography is about enjoying the process and expressing your creativity. We hope these insights inspire you to explore and improve your skills!
FAQ
What is the best way to stabilize my camera while using a tripod?
How do I choose the right tripod for my camera?
Should I disable image stabilization when using a tripod?
What settings should I use for long exposure photography?
How can I prevent camera shake when pressing the shutter button?
What accessories can enhance my tripod setup?
How do I adjust my tripod for uneven terrain?
What are the best practices for night photography with a tripod?
Struggling to get consistent photography clients?
Get More Photography Clients